Section 3 of 3
Configure credentials
In this section, we'll create a Uffizzi Cloud account and connect it with your CI provider.
Connect to Uffizzi Cloud from an external CI provider
In the previous section, we added a GitHub Actions reusable workflow to our pipeline that takes several inputs, including:
usernameserverprojectpassword
In this section, we'll add our container registry credentials in the Uffizzi Dashboard, then create the username, password, and project values to pass to the workflow. If you haven't already done so, sign up at Uffizzi Cloud, and then follow these steps to set up your account:
1. Add container registry credentials to Uffizzi
How you add container registry credentials to Uffizzi depends on your registry of choice.
GHCR
If you use GitHub Container Registry (ghcr.io), you will need to generate a Github personal access token with access to the read:packages scope. Once this token is generated, add it as a GitHub repository secret, then pass this value to the reusable workflow using the personal-access-token parameter, as described in the previous section.
ECR, ACR, GCR, Docker Hub
If you use Amazon ECR, Azure Container Registry (ACR), Google Container Registry (GCR), or Docker Hub, you should add your credentials as GitHub repository secrets. In the highlighted example below, AWS_ACCESS_KEY_ID and AWS_SECRET_ACCESS_KEY are used:
[...]

jobs:
  # Build and push app image
  build-app:
    name: Build and Push `app`
  runs-on: ubuntu-latest
  outputs:
    tags: ${{ steps.meta.outputs.tags }}
  steps:
    - name: Login to ECR
      uses: docker/login-action@v2
      with:
        registry: 263049488290.dkr.ecr.us-east-1.amazonaws.com
        username: ${{ secrets.AWS_ACCESS_KEY_ID }}
        password: ${{ secrets.AWS_SECRET_ACCESS_KEY }}
    - name: Checkout git repo
      uses: actions/checkout@v3
    - name: Docker metadata
      id: meta
      uses: docker/metadata-action@v3
      with:
        images: 263049488290.dkr.ecr.us-east-1.amazonaws.com/app
    - name: Build and Push Image to ECR
      uses: docker/build-push-action@v2
      with:
        push: true
        tags: ${{ steps.meta.outputs.tags }}
        labels: ${{ steps.meta.outputs.labels }}
        context: ./app

  [...]
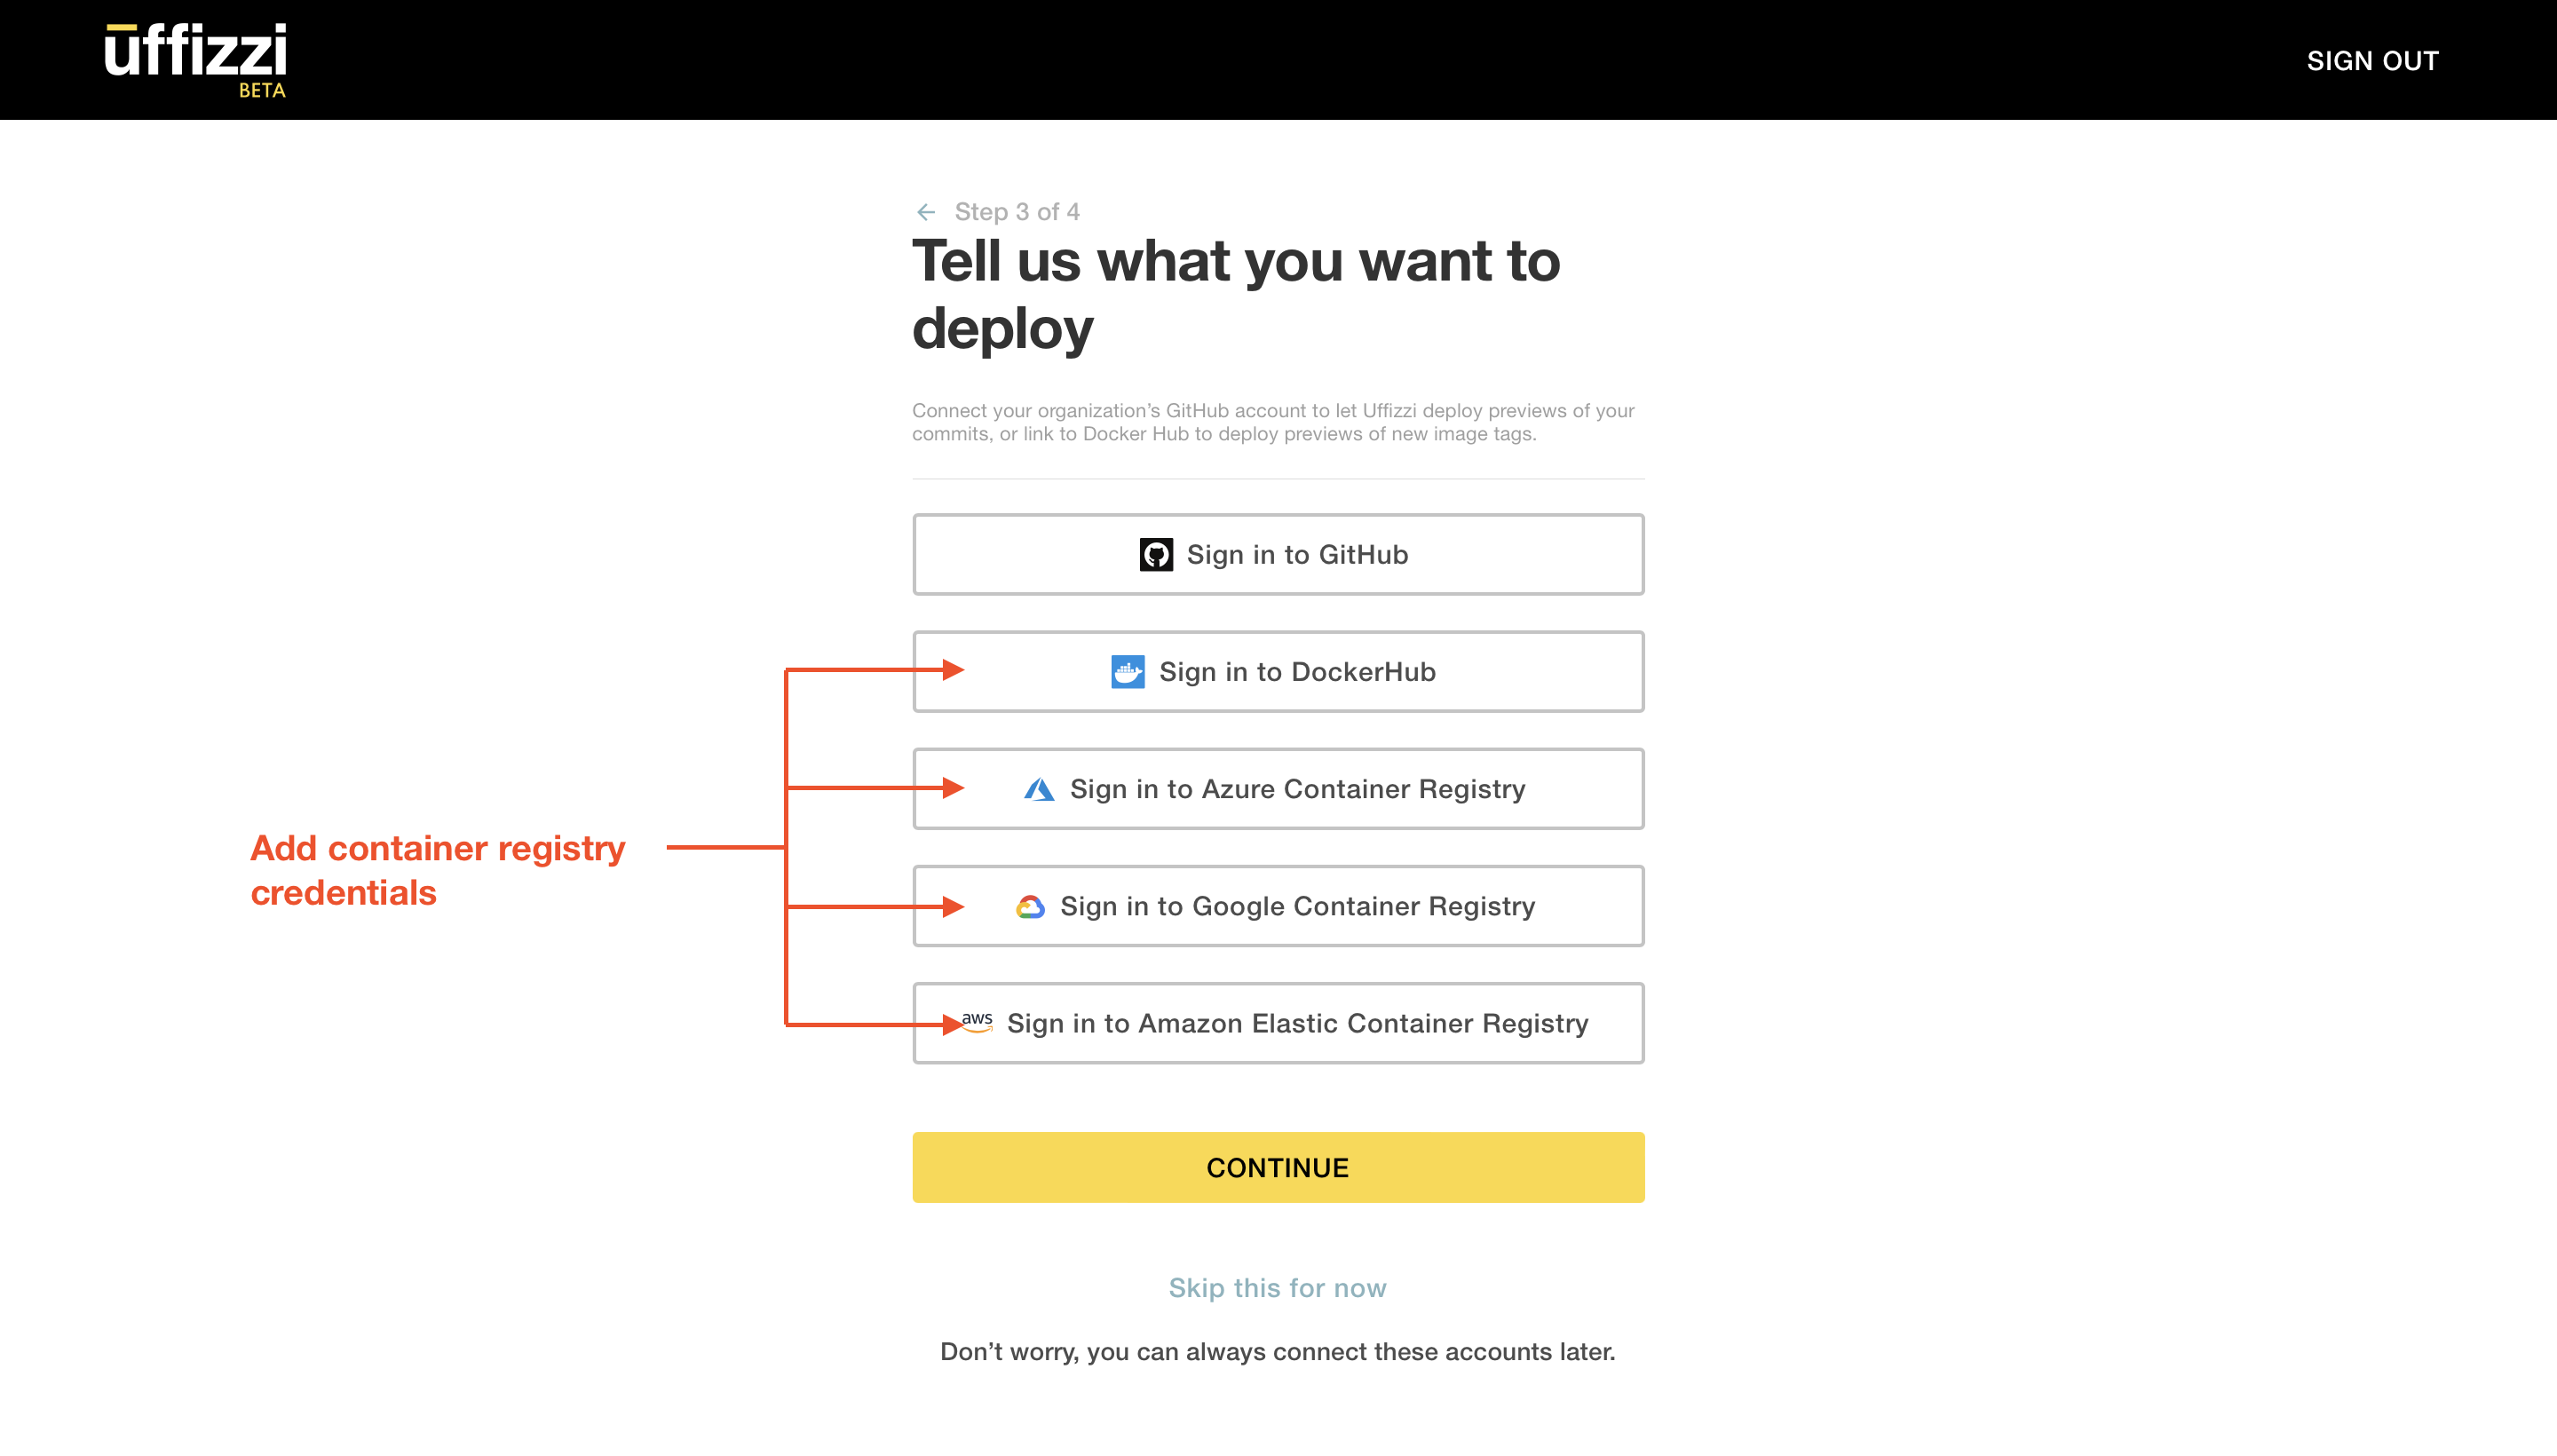
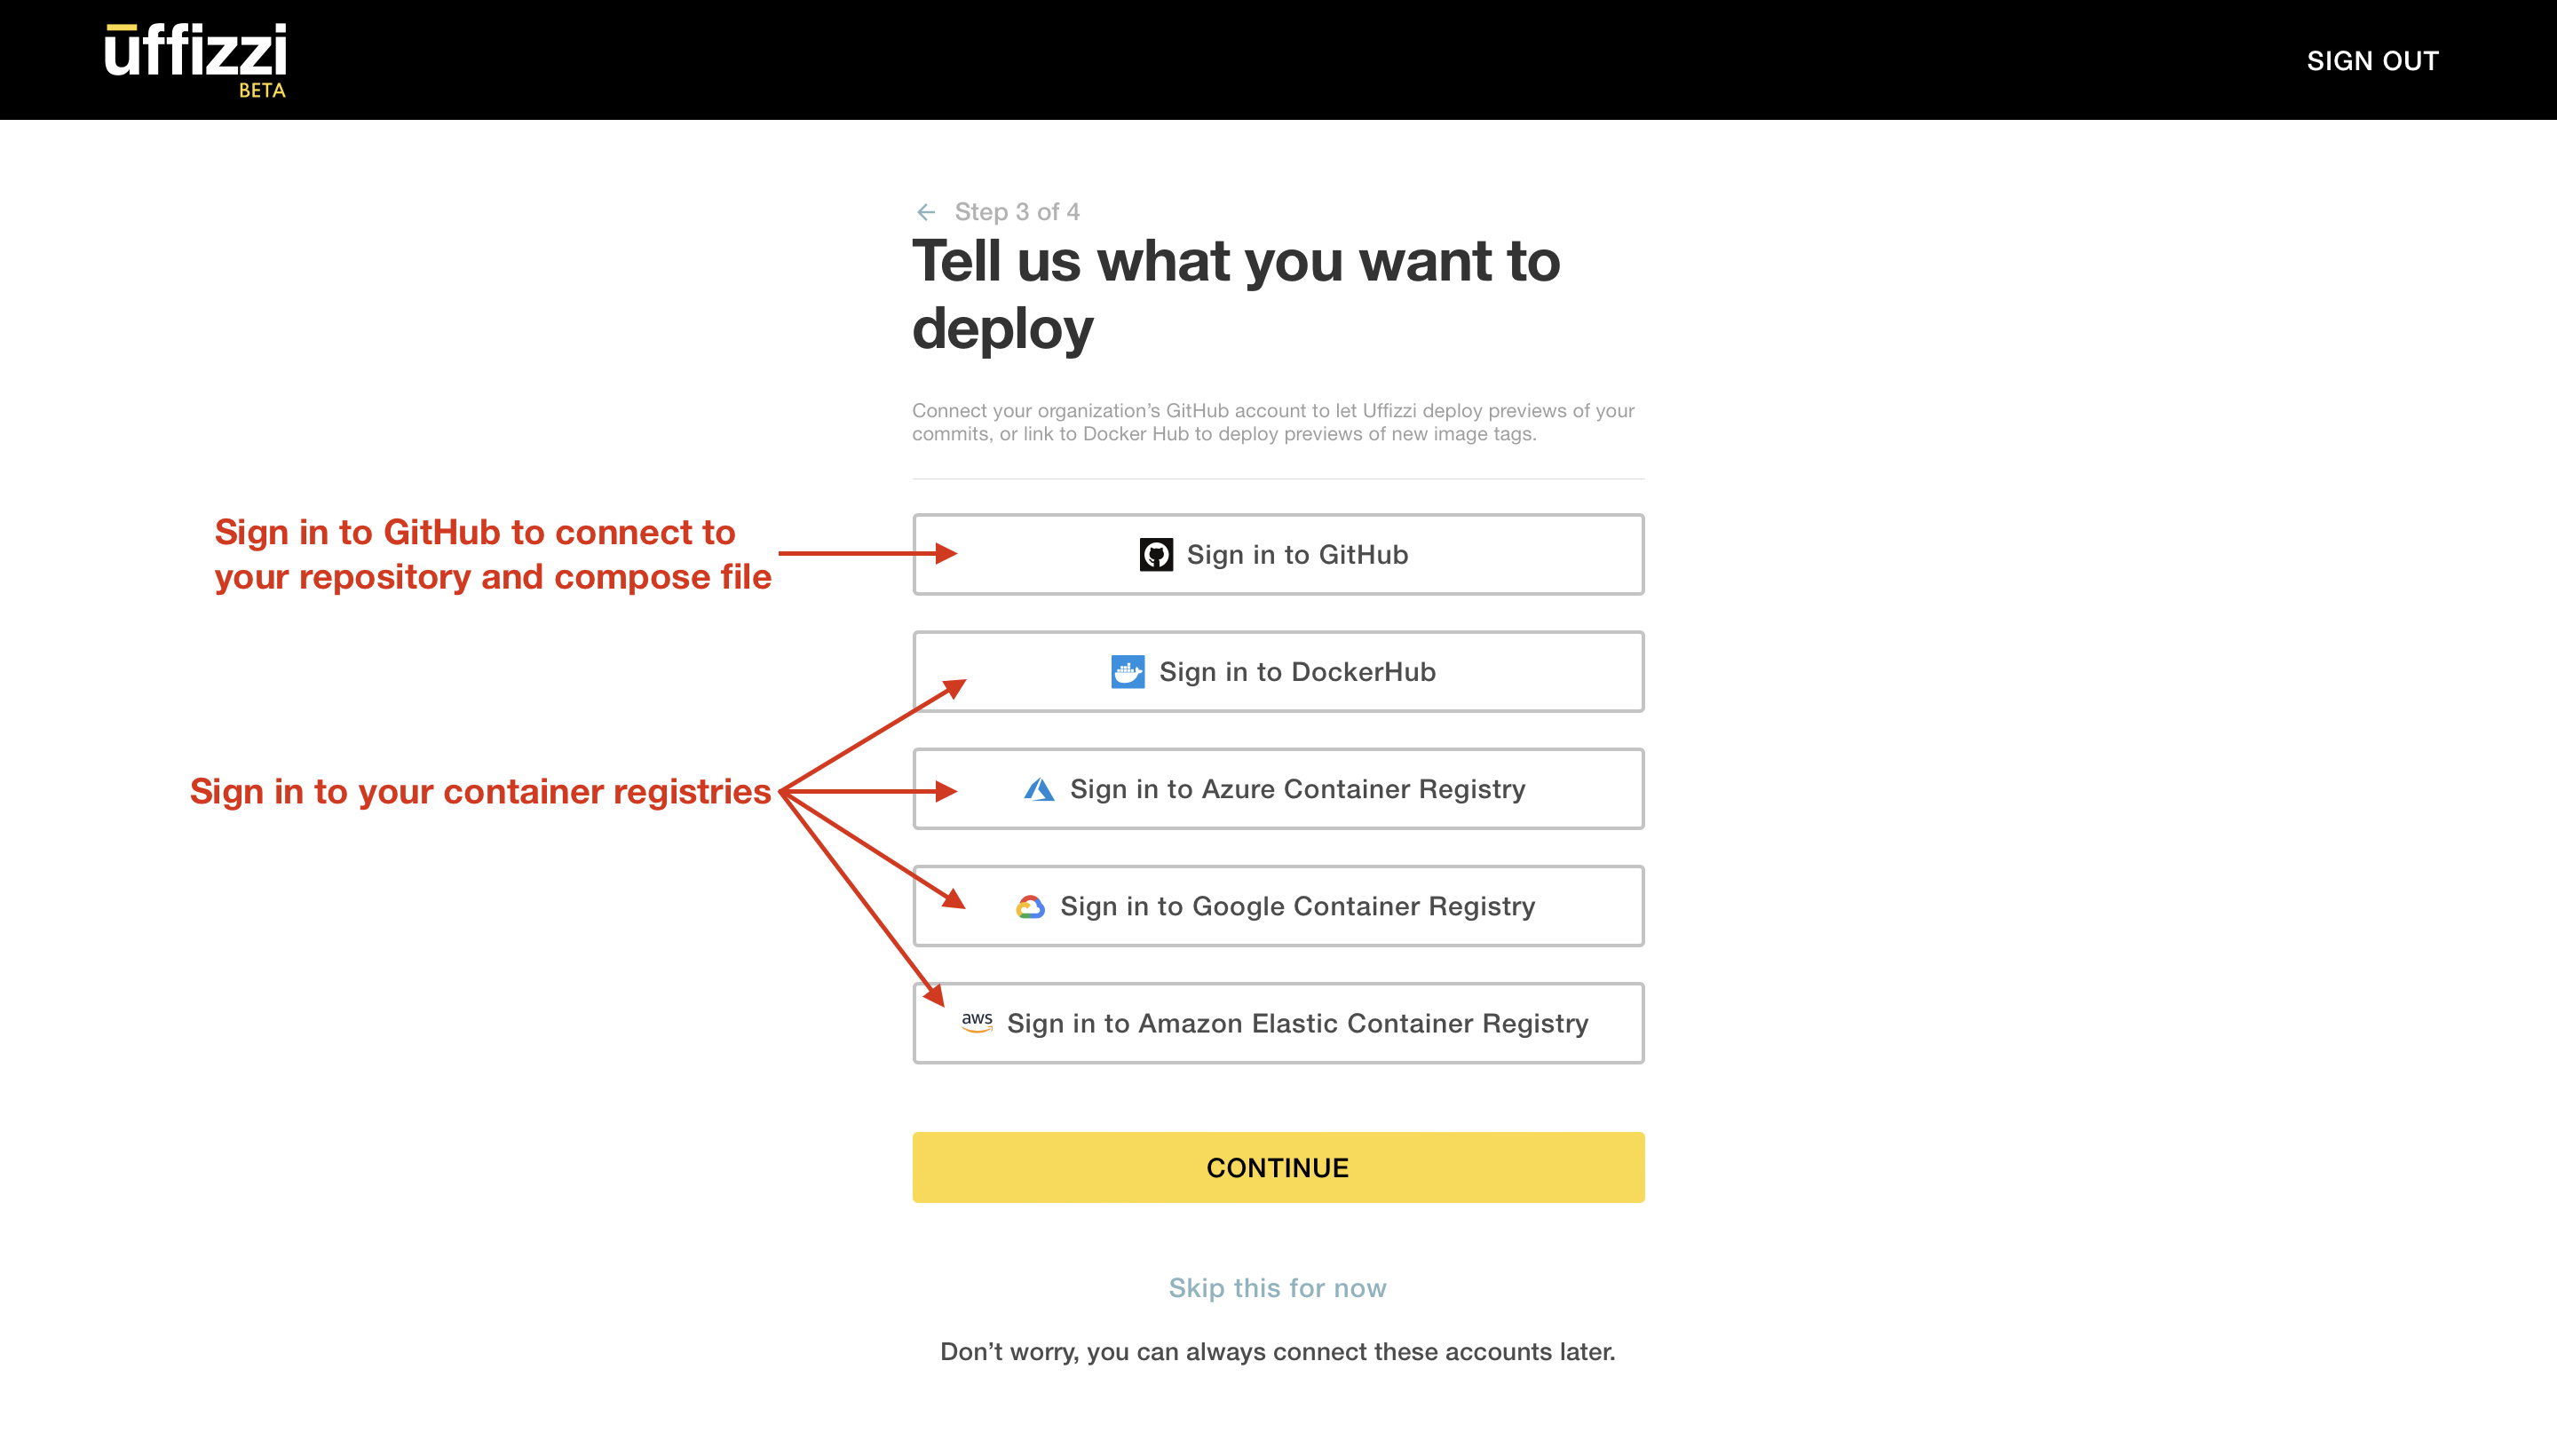
Now, we need to add these same credentials in the Uffizzi Dashboard. In Step 3 of 4 of the account setup guide, you are asked to connect to various external services, as shown below. Select the Sign in option for your registry provider(s) of choice, then enter your credentials. For example, to add AWS_ACCESS_KEY_ID and AWS_SECRET_ACCESS_KEY, select Sign in to Amazon Elastic Container Registry.
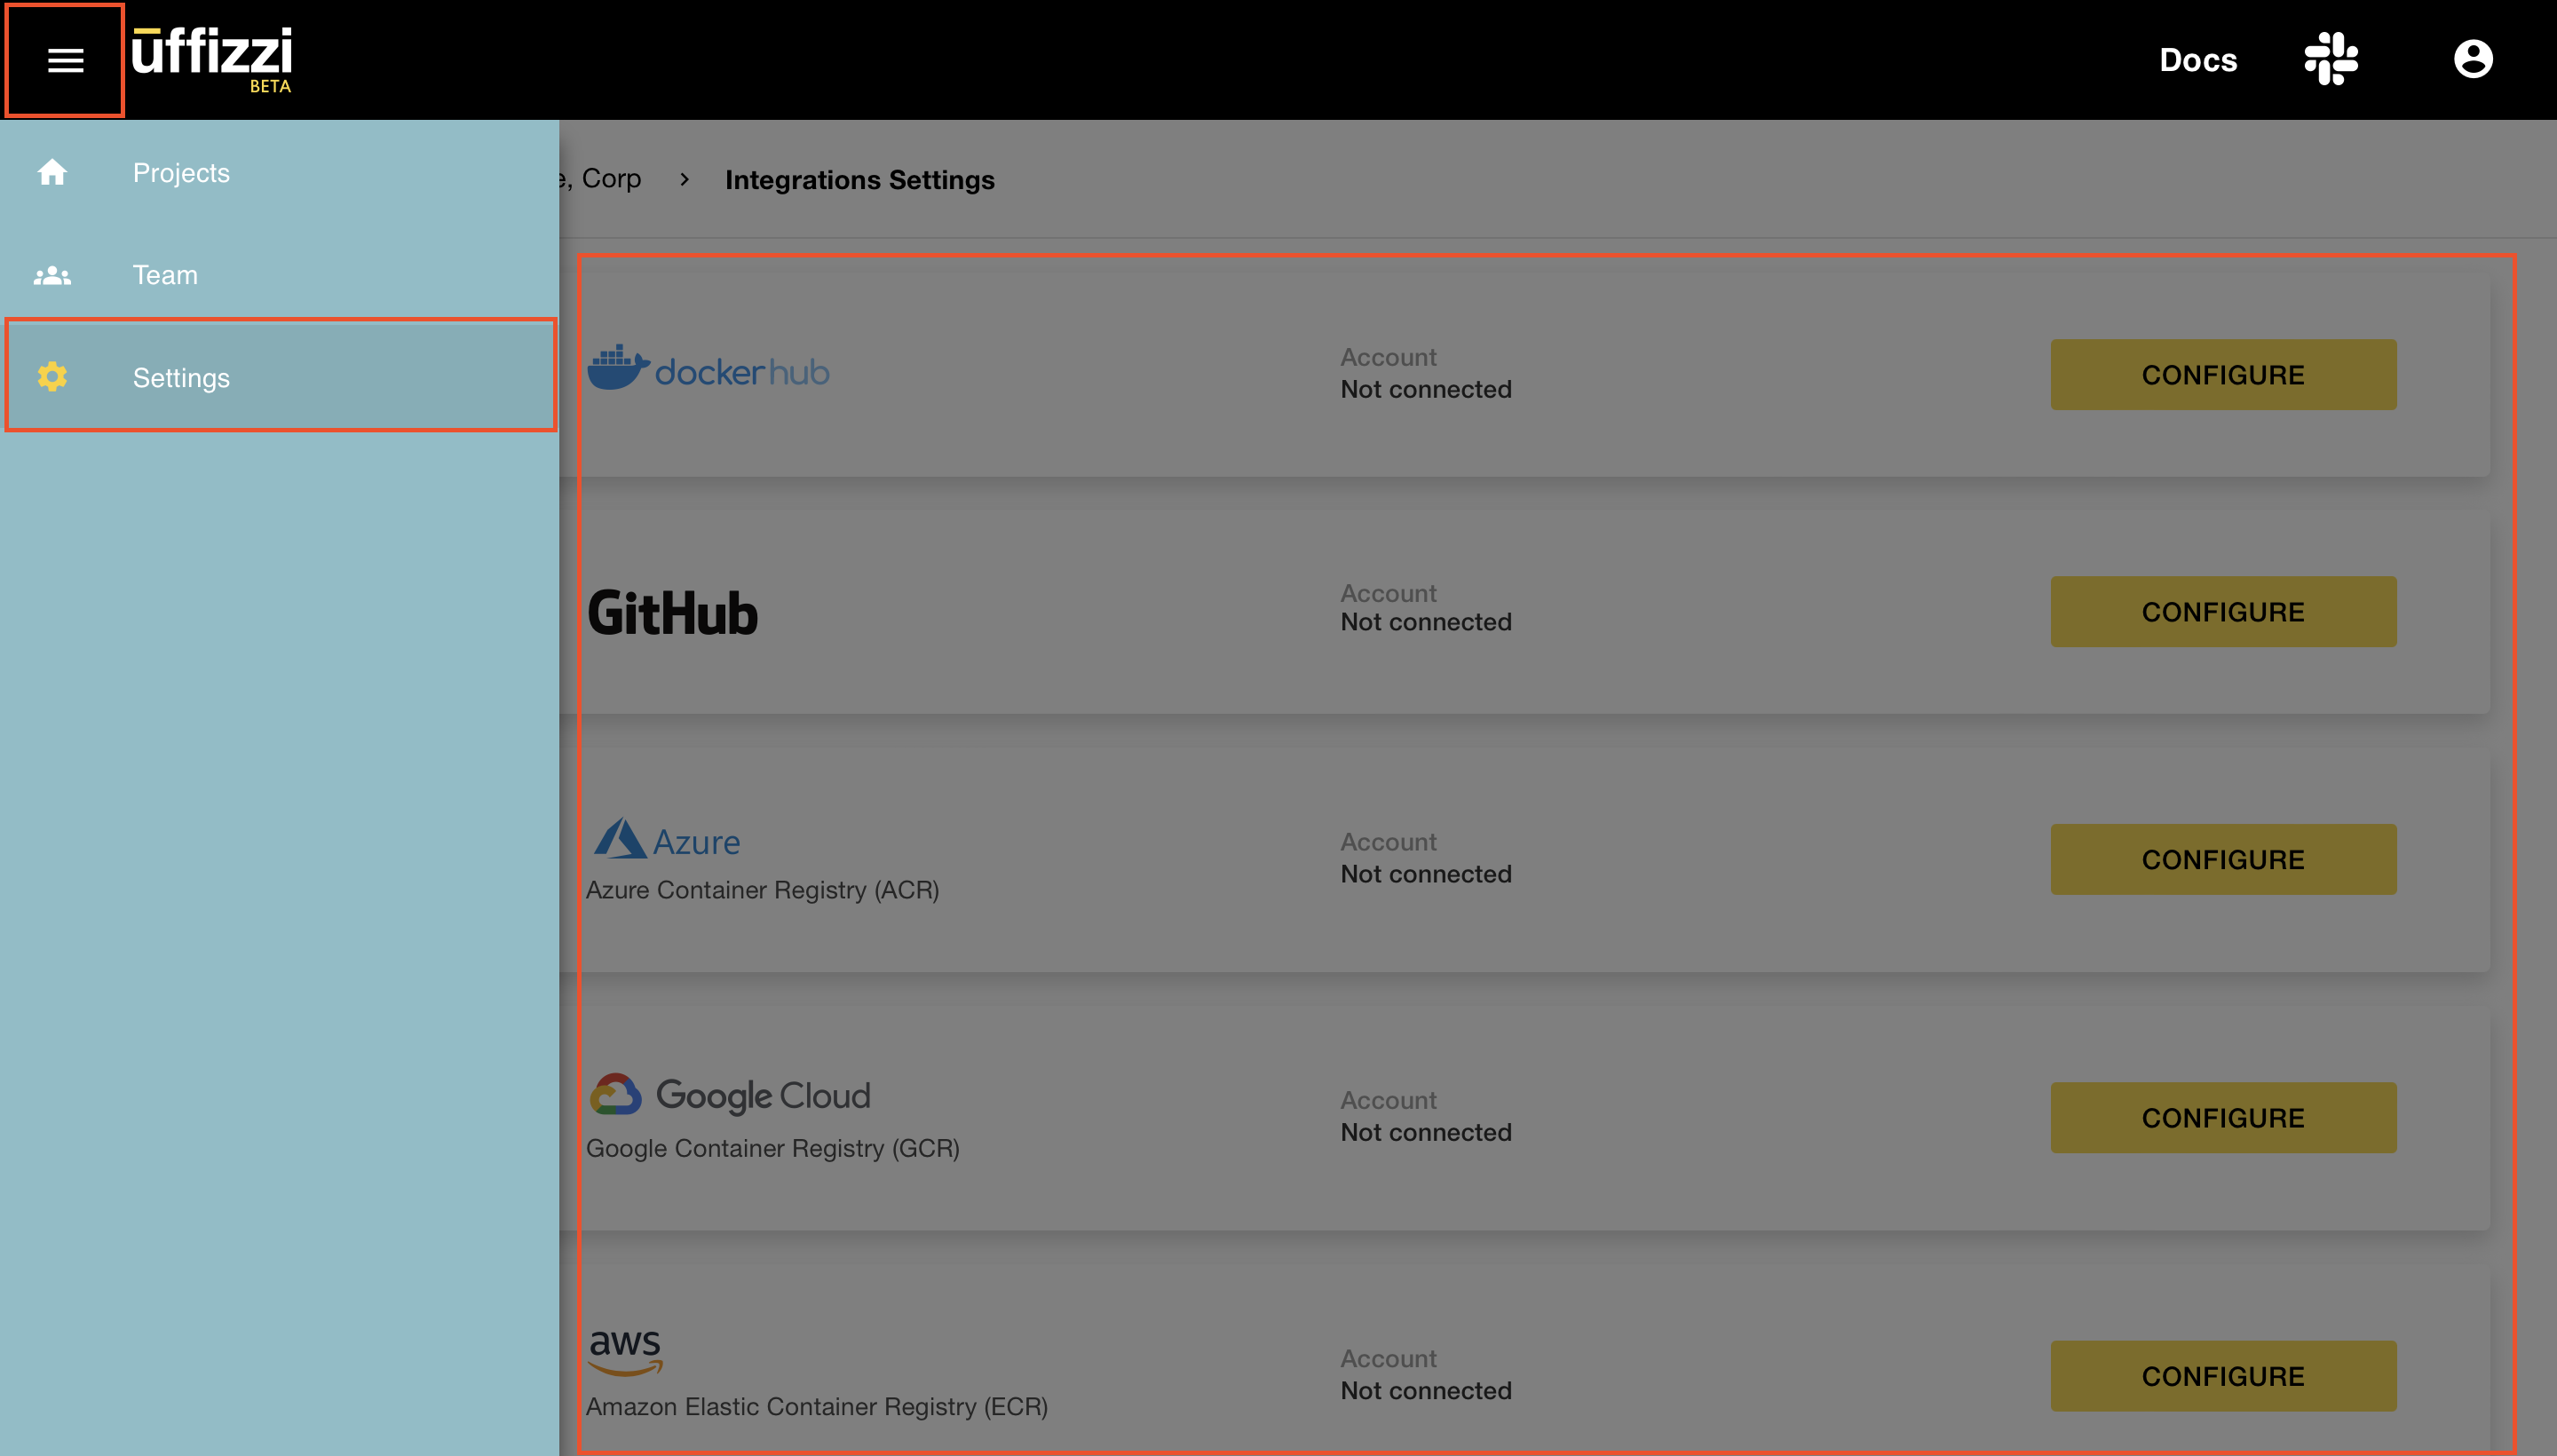
After account setup, you can make changes to your credentials by selecting Menu (three horizontal lines) > Settings > Integrations > CONFIGURE/DISCONNECT.
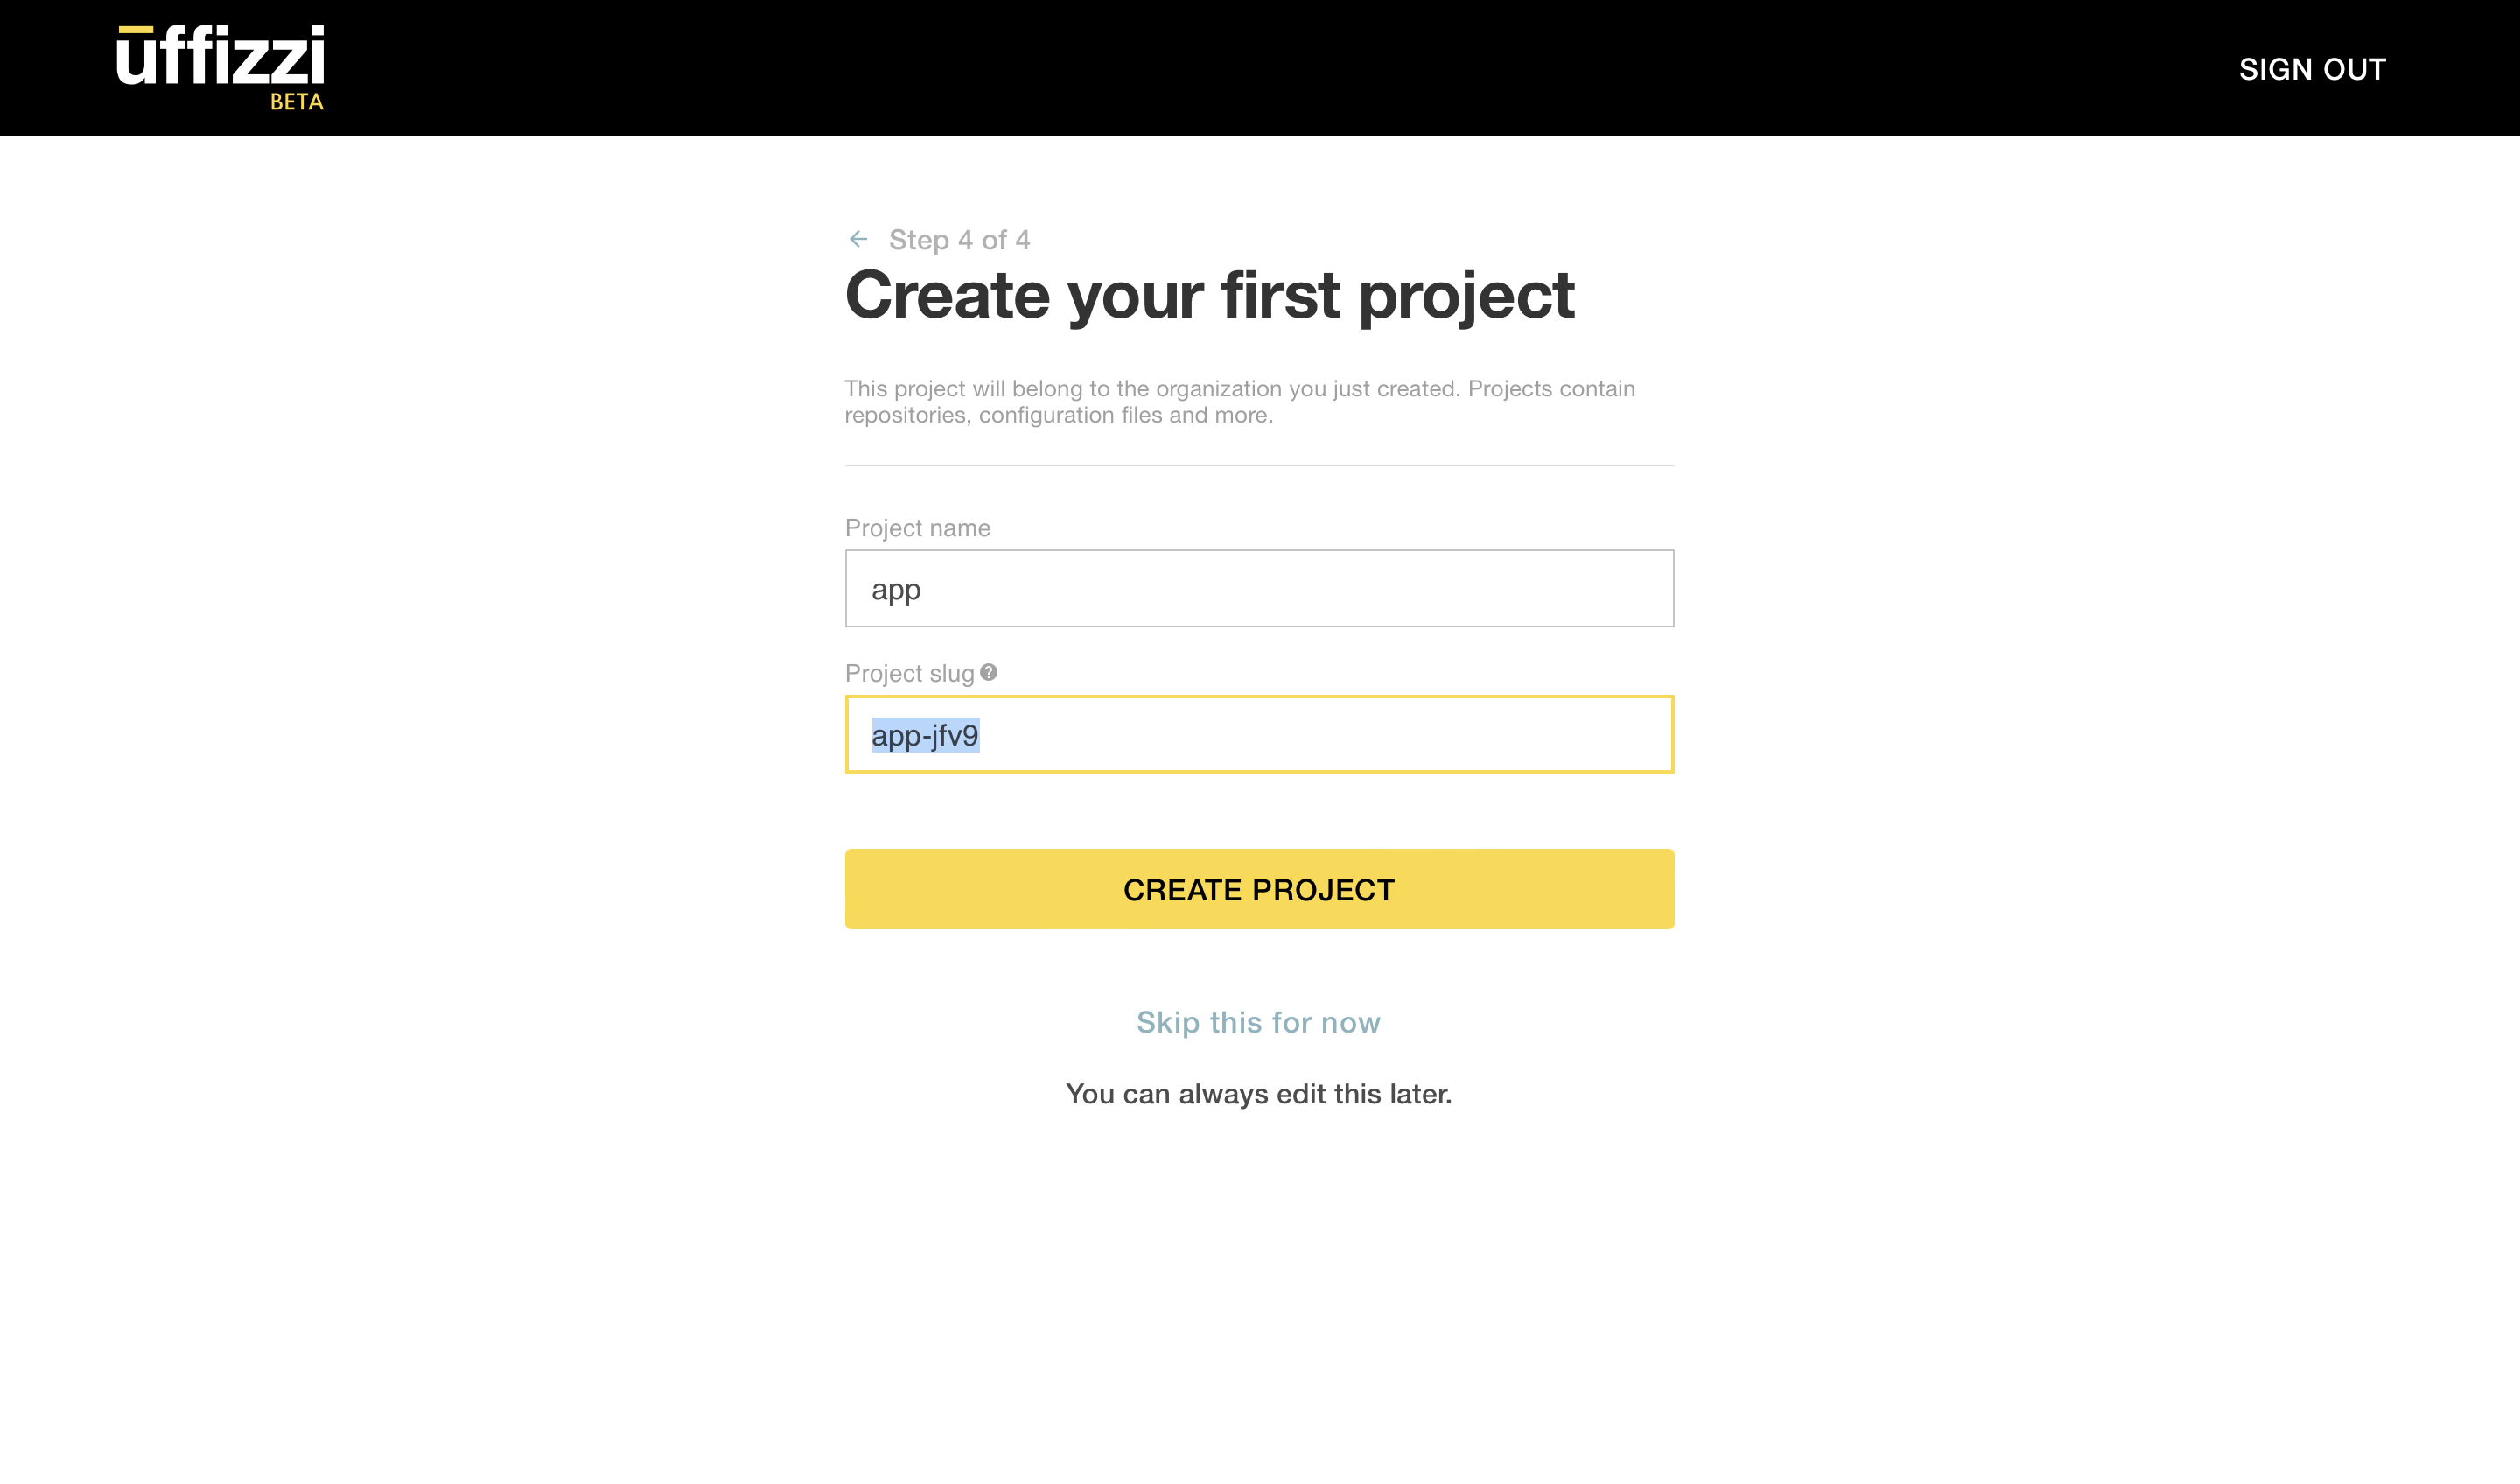
2. Make note of your project slug
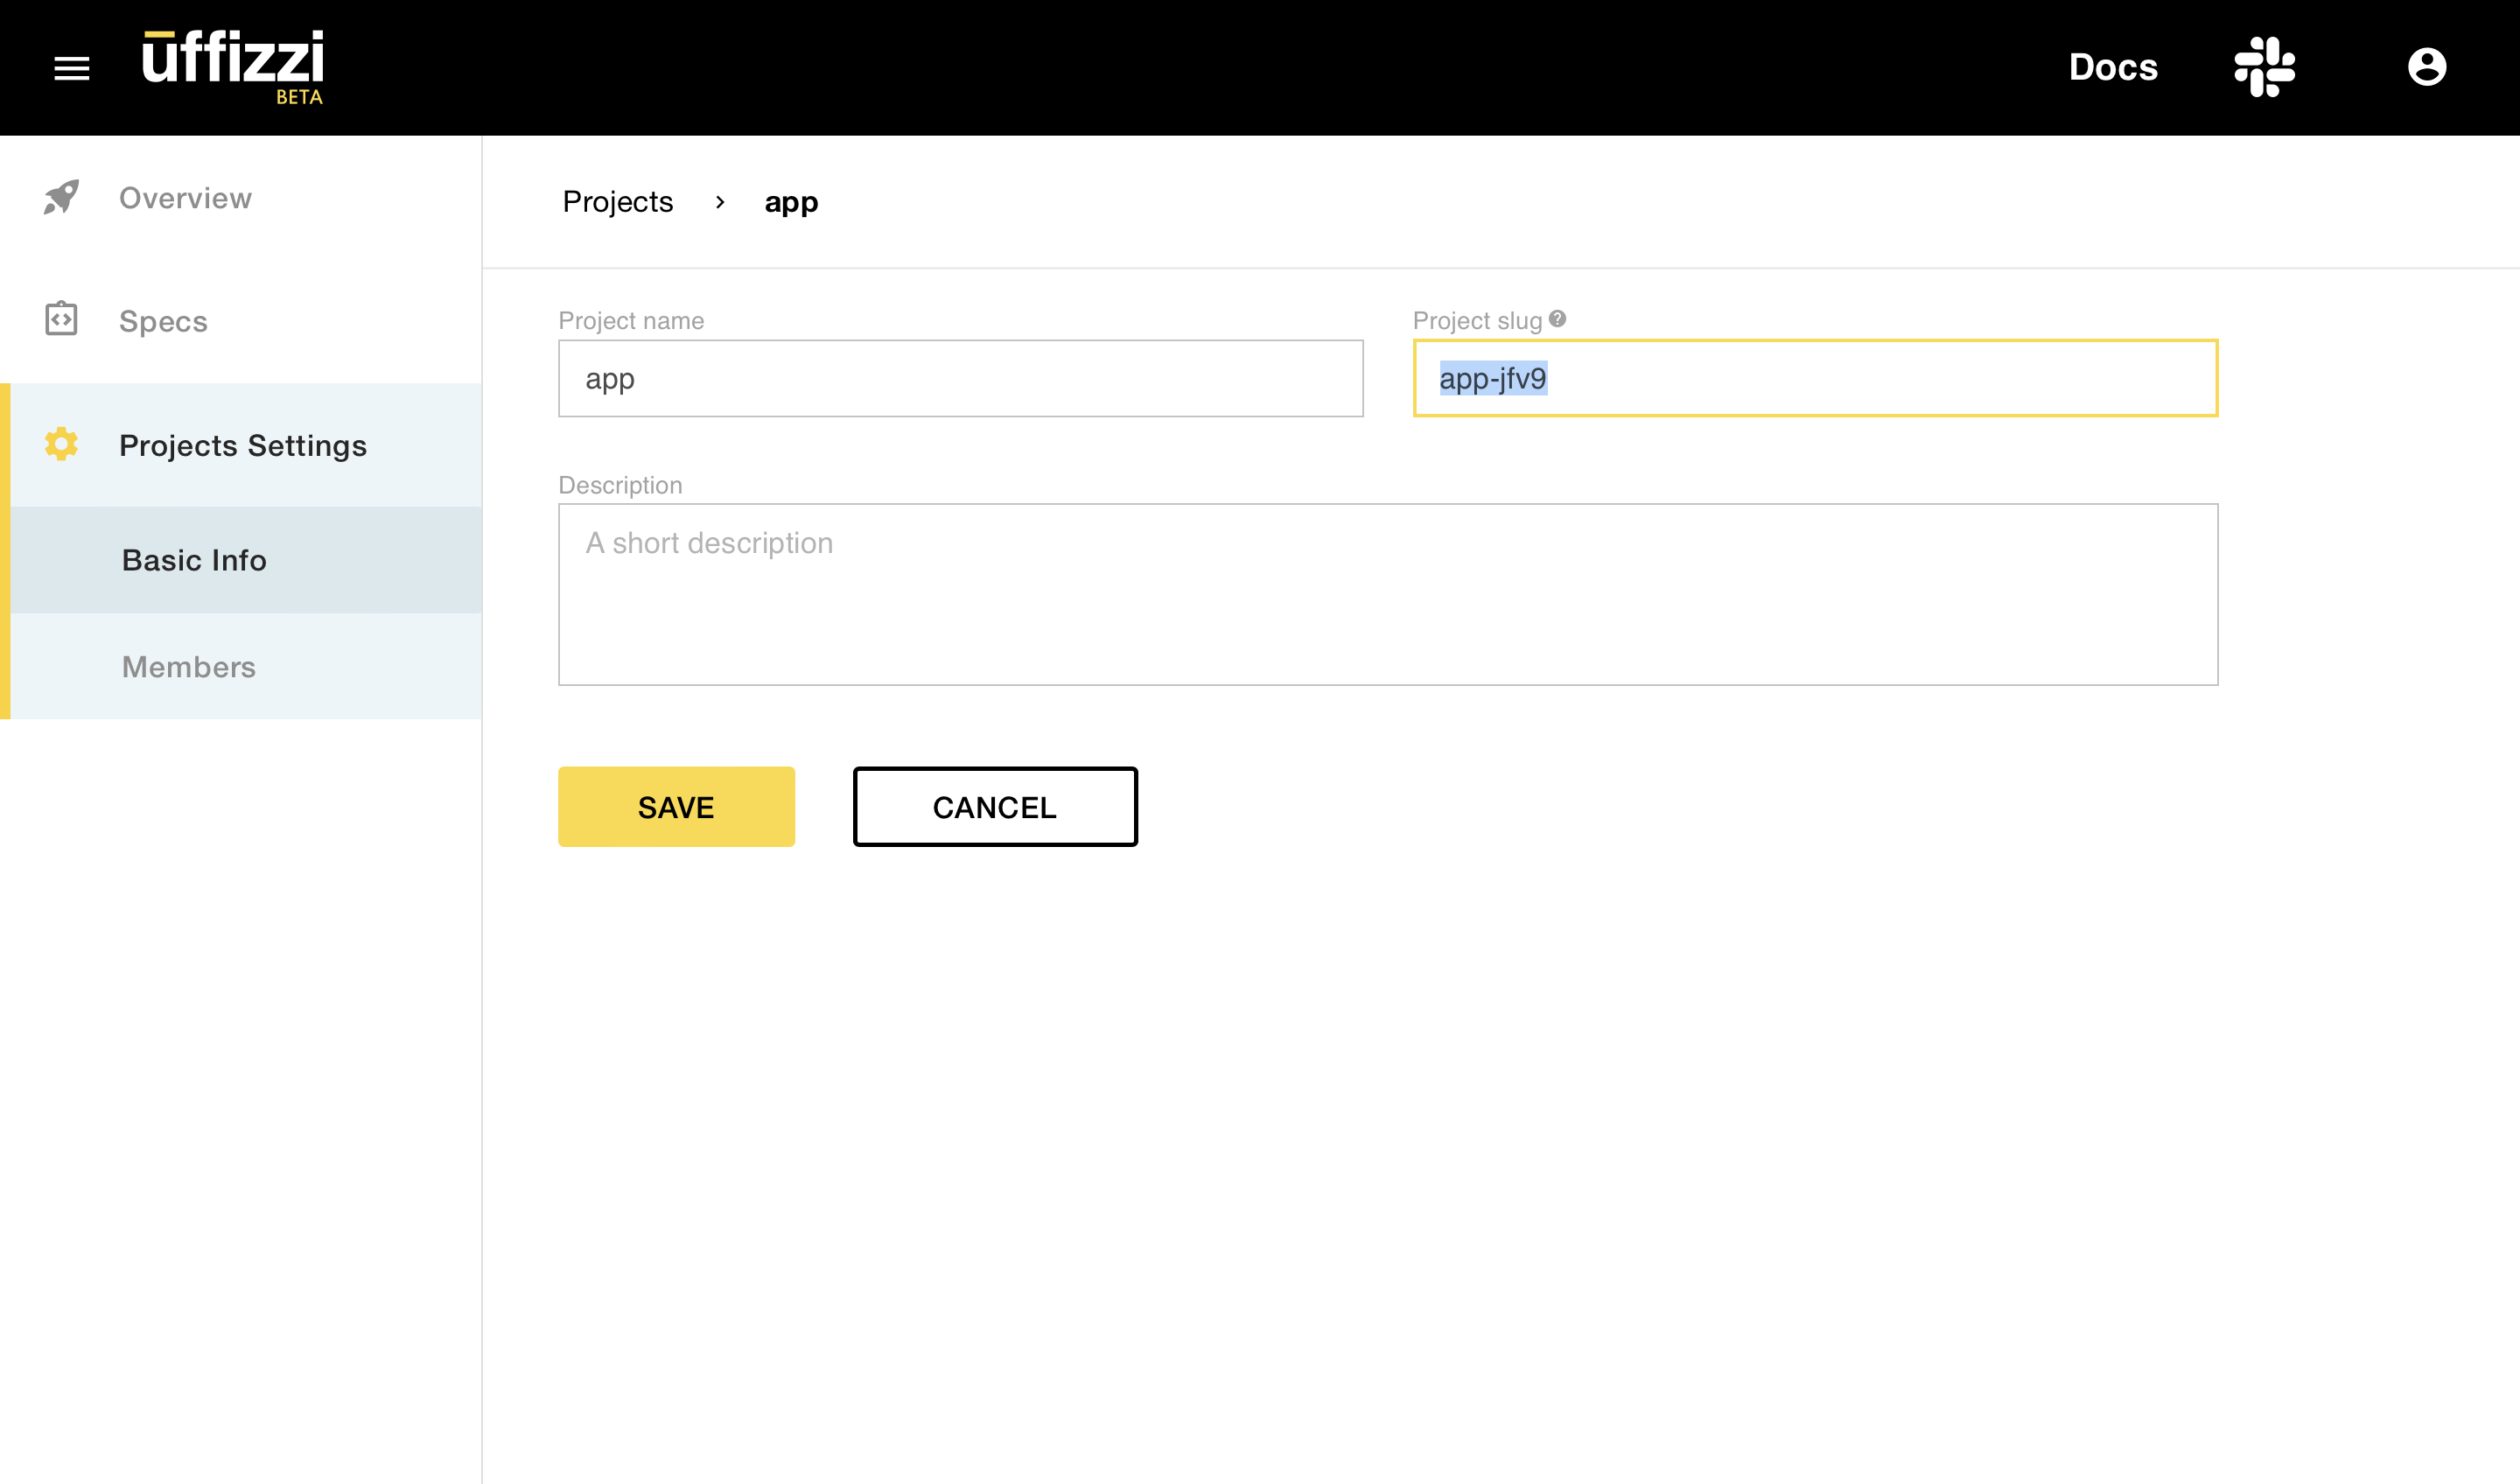
In Step 4 of 4, make note of the project slug when creating your project. You will need it to set the project parameter of the deploy-uffizzi-preview and delete-uffizzi-preview jobs of your pipeline that we configured in the previous section. A project slug is URL-compatible ID used to uniquely identify your project. This can be seen highlighted in the image below. You can also find the project slug on the Project Settings page, as shown in the second image below.
3. Add username, server, and project to your create, update, and delete jobs
Back in GitHub Actions, input your Uffizzi username (i.e. email address), server (https://app.uffizzi.com), and project slug values into the deploy and delete jobs, as highlighted below:
name: Build images and deploy with Uffizzi

  [...]

  # Create and update test environments with Uffizzi
  deploy-uffizzi-preview:
    name: Use Remote Workflow to Preview on Uffizzi
    needs: render-compose-file
    uses: UffizziCloud/preview-action/.github/workflows/reusable.yaml@v2.1.0
    if: ${{ github.event_name == 'pull_request' && github.event.action != 'closed' }}
    with:
      compose-file-cache-key: ${{ needs.render-compose-file.outputs.compose-file-cache-key }}
      compose-file-cache-path: docker-compose.rendered.yml
      username: foo@example.com
      server: https://app.uffizzi.com
      project: my-application
    secrets:
      password: ${{ secrets.UFFIZZI_PASSWORD }}
      personal-access-token: ${{ secrets.GHCR_ACCESS_TOKEN }}
      url-username: admin
      url-password: ${{ secrets.URL_PASSWORD }}
    permissions:
      contents: read
      pull-requests: write

  # Delete test environments with Uffizzi
  delete-uffizzi-preview:
    name: Use Remote Workflow to Delete an Existing Preview
    uses: UffizziCloud/preview-action/.github/workflows/reusable.yaml@v2.1.0
    if: ${{ github.event_name == 'pull_request' && github.event.action == 'closed' }}
    with:
      compose-file-cache-key: ''
      compose-file-cache-path: docker-compose.rendered.yml
      username: foo@example.com
      server: https://app.uffizzi.com
      project: my-application
    secrets:
      password: ${{ secrets.UFFIZZI_PASSWORD }}
    permissions:
      contents: read
      pull-requests: write
4. Add UFFIZZI_PASSWORD as a GitHub Actions secret
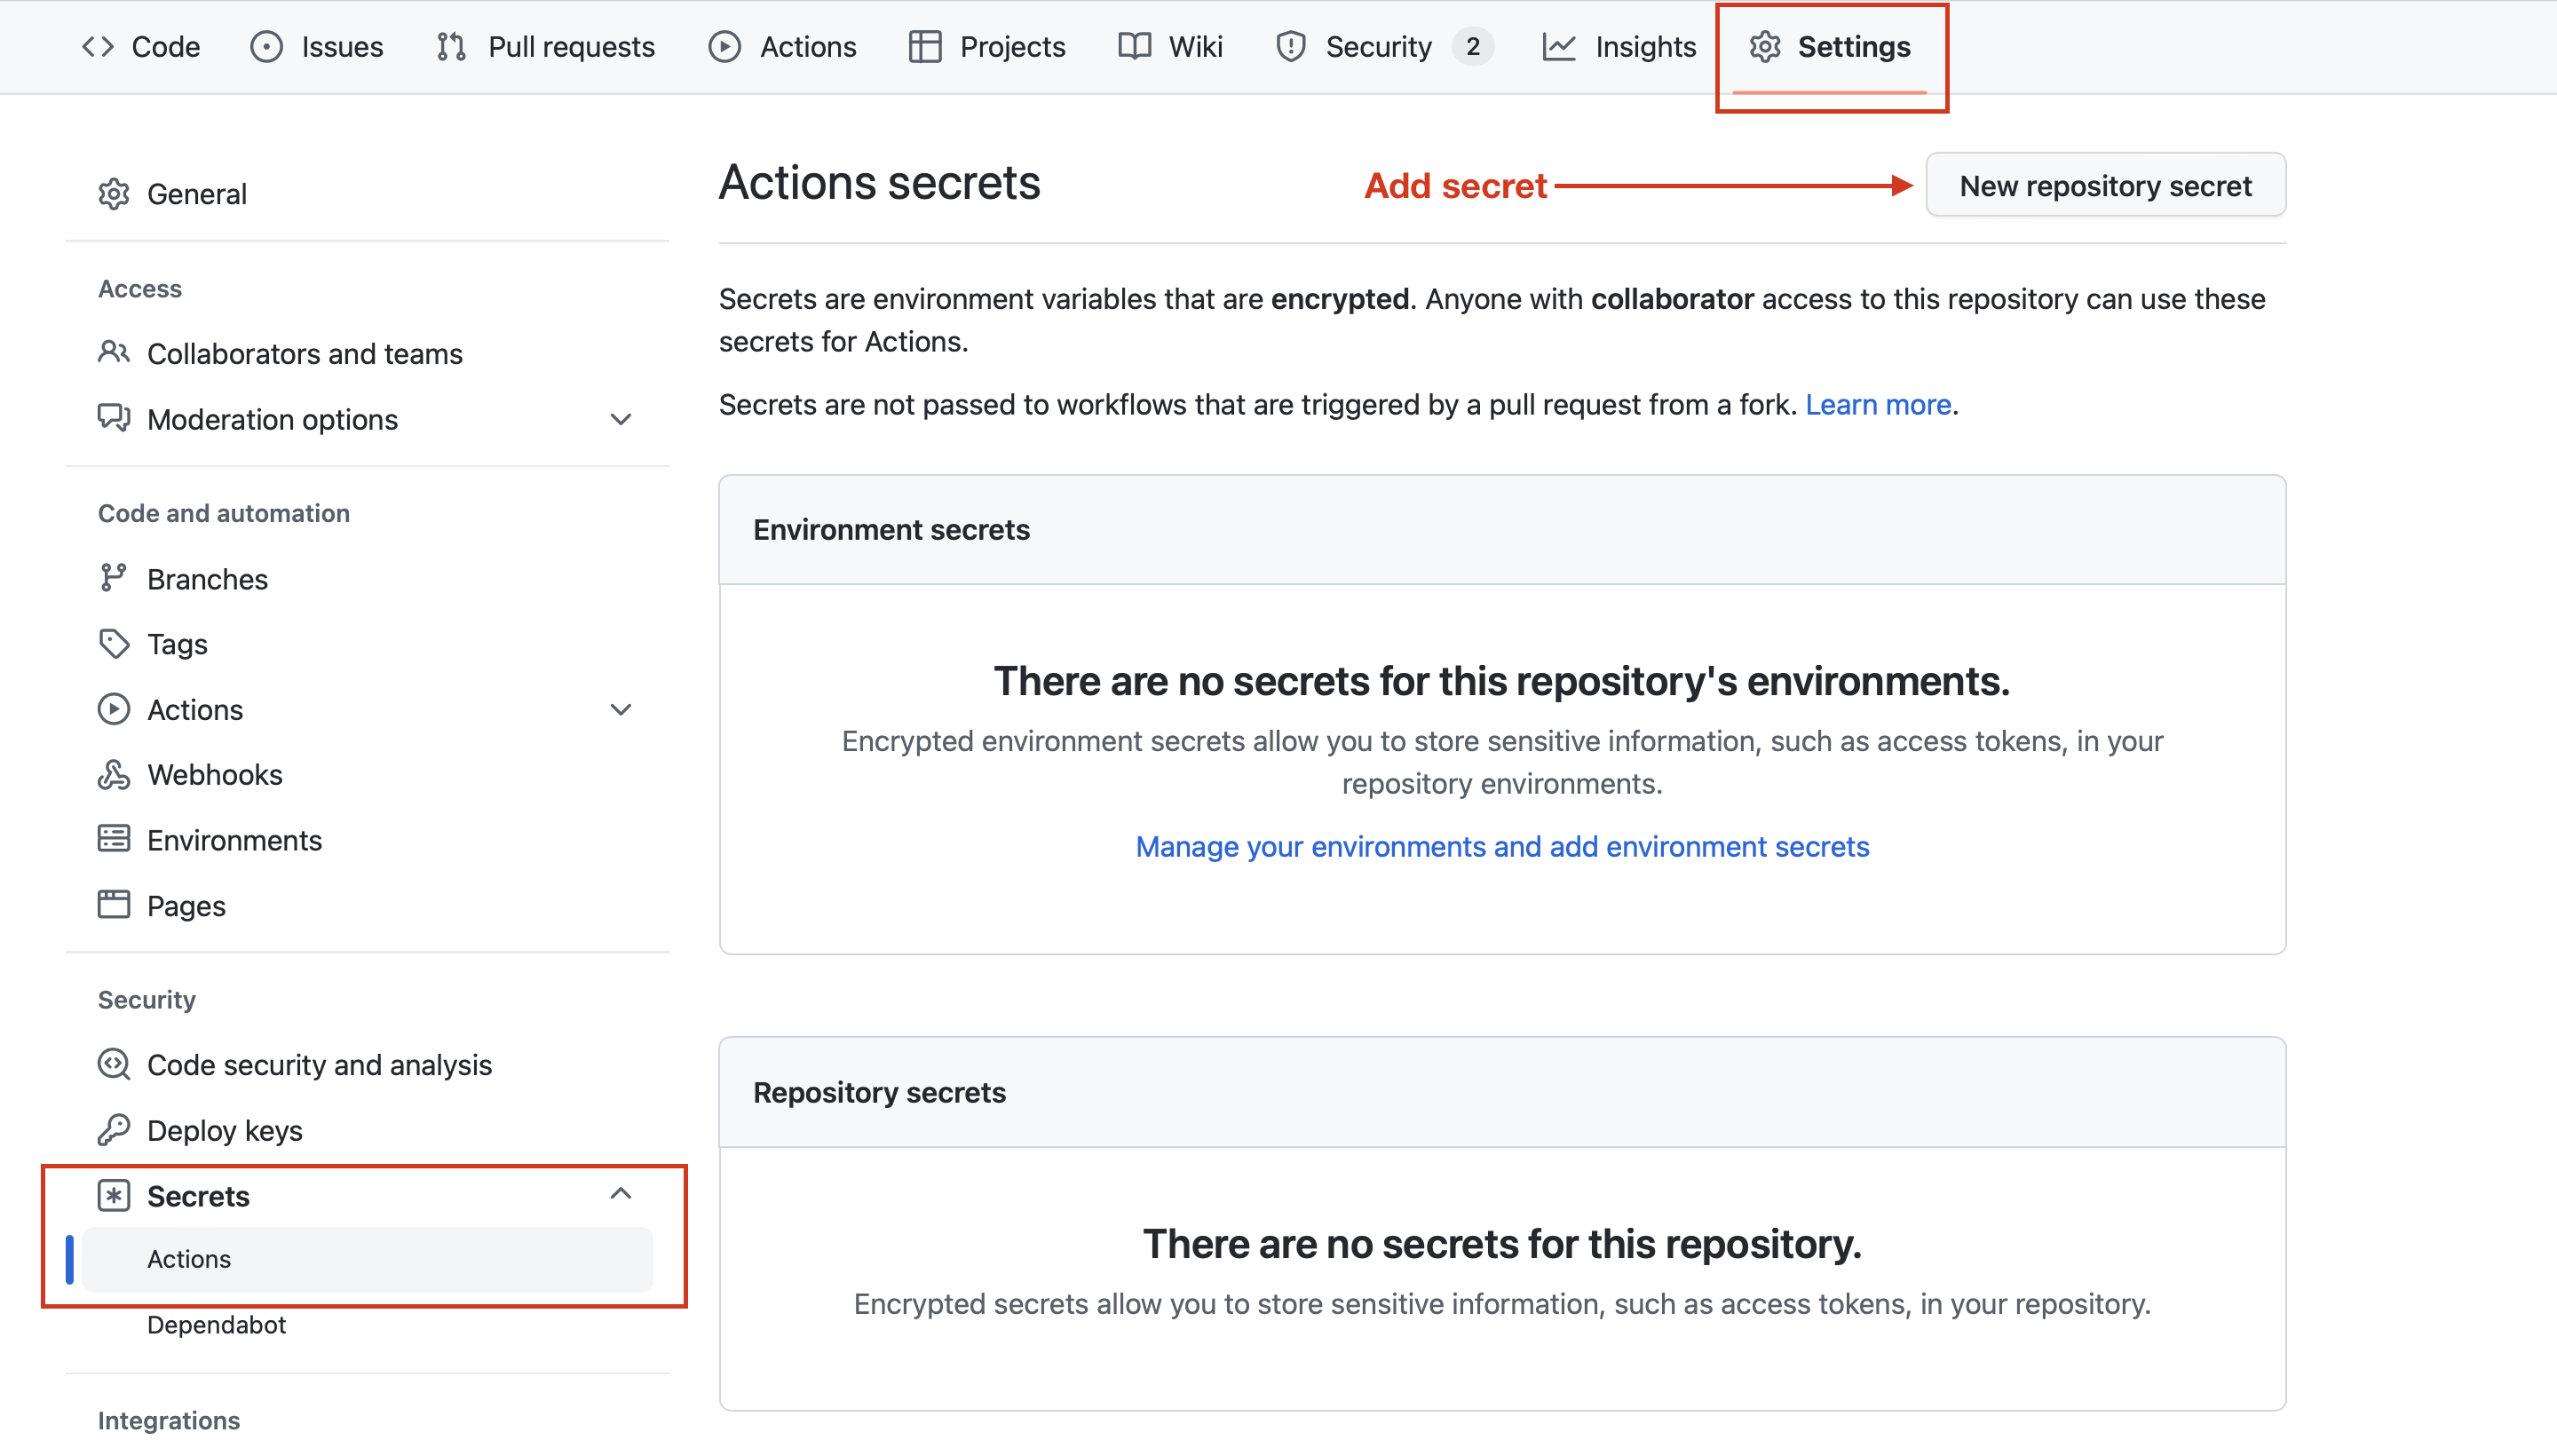
In GitHub, navigate to your repository, then select Settings > Secrets > Actions > New repository secret.
For the name, enter UFFIZZI_PASSWORD. For the value, enter your Uffizzi account password. Then select Add secret. After your secret is added here, you can update or remove it, but you will not be able to view the plaintext again within GitHub. 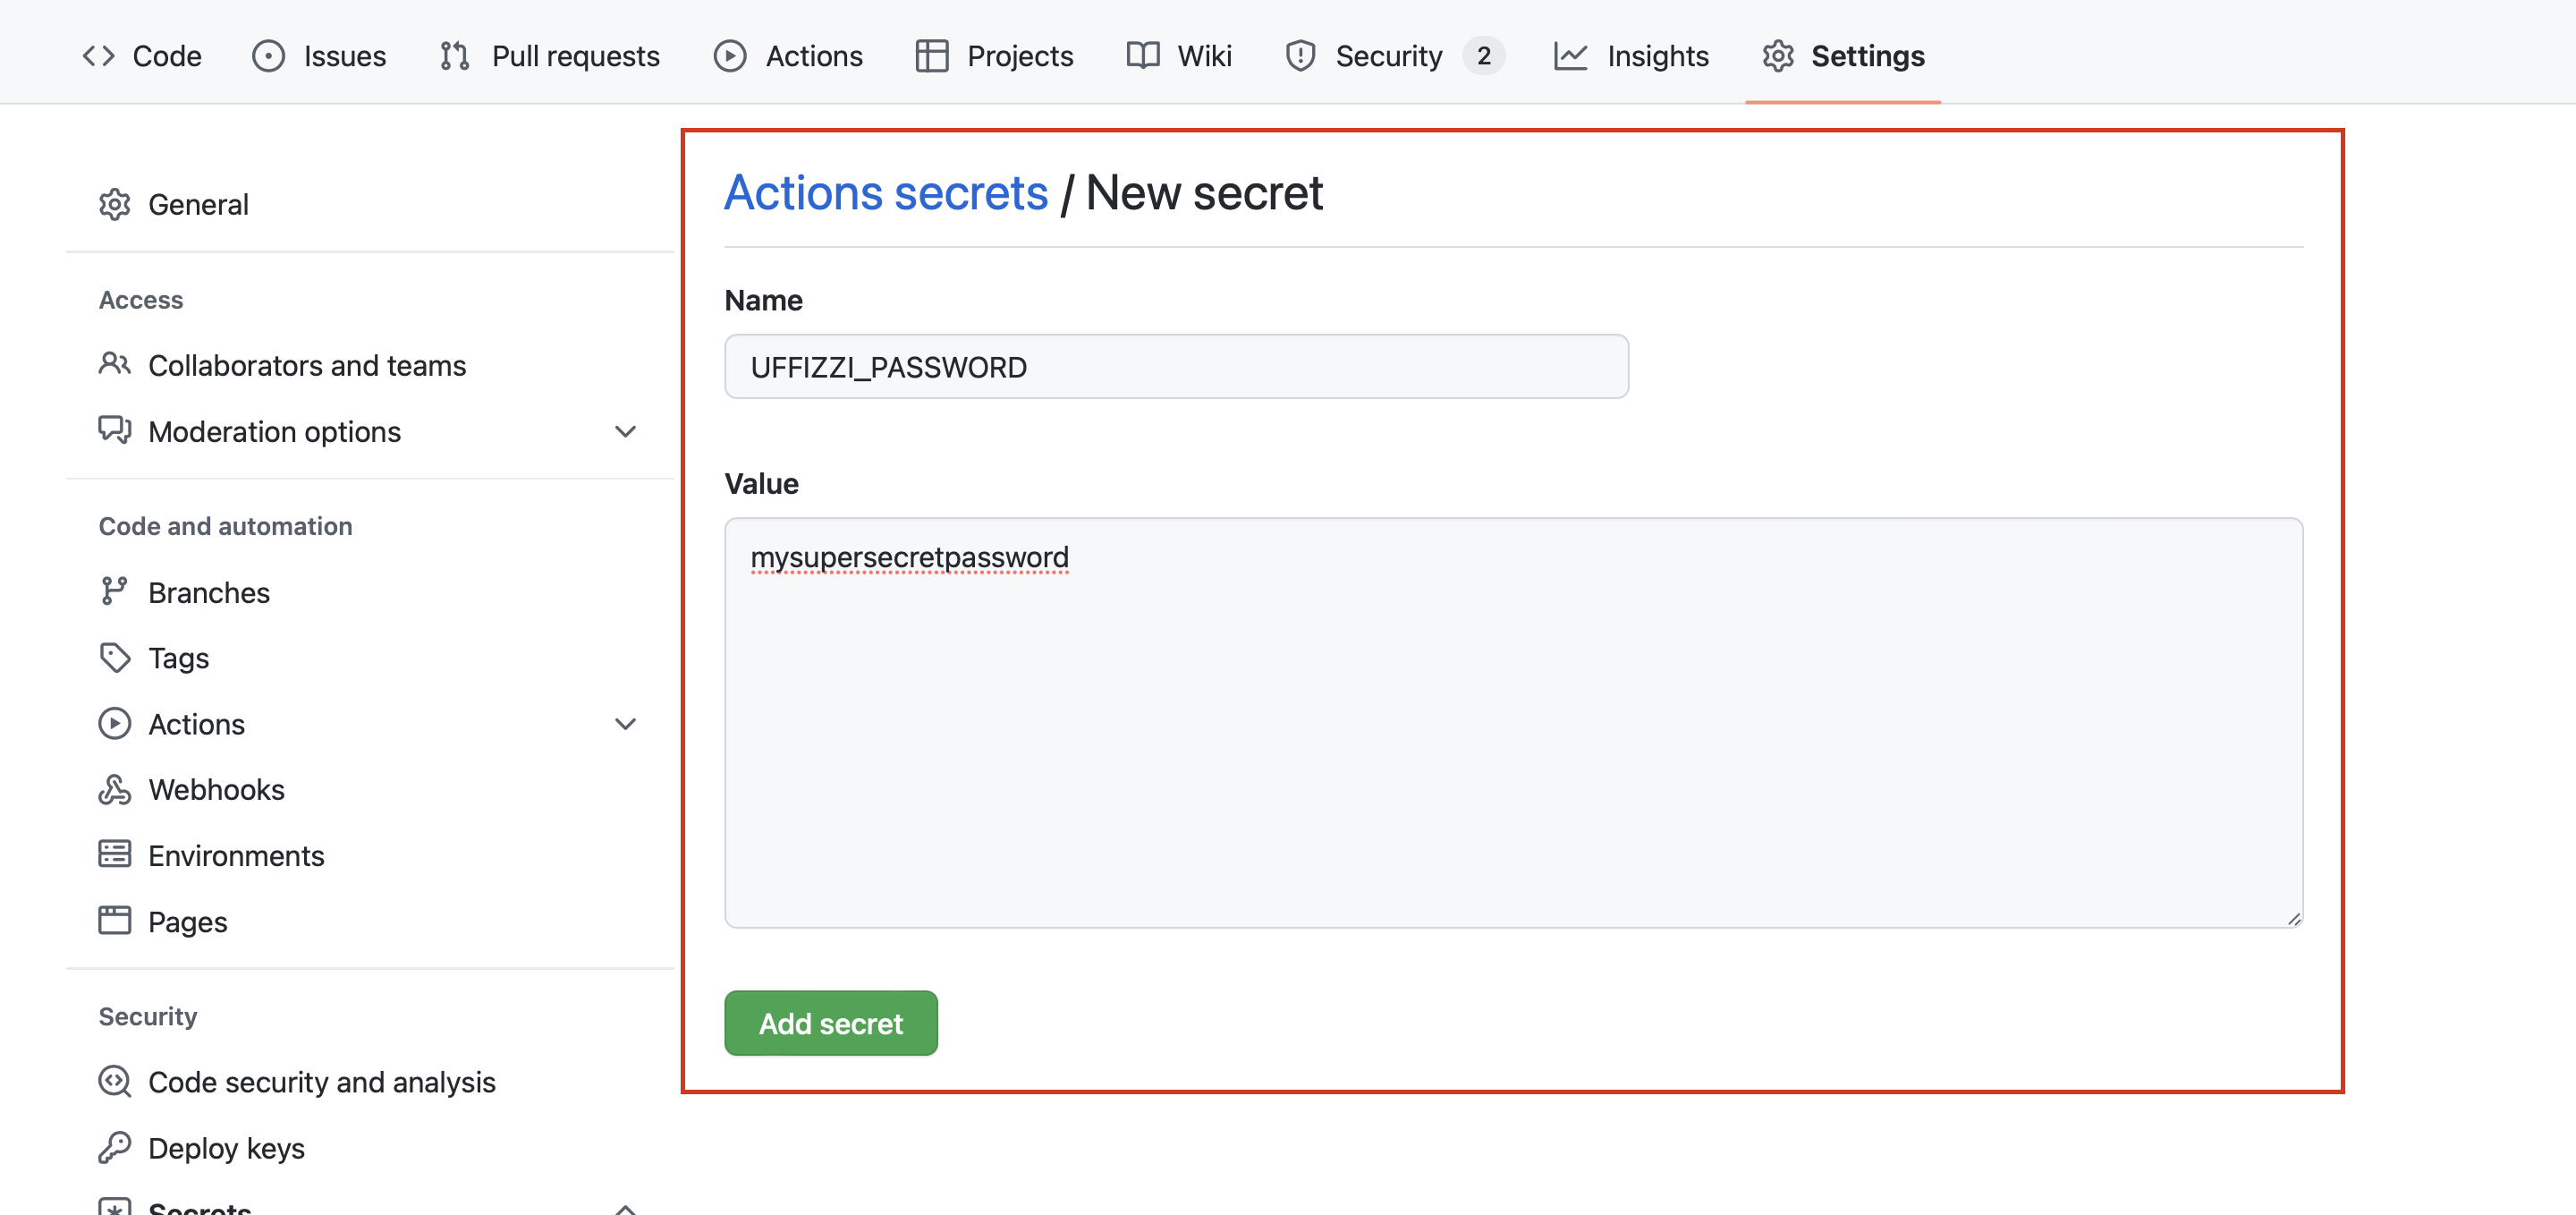
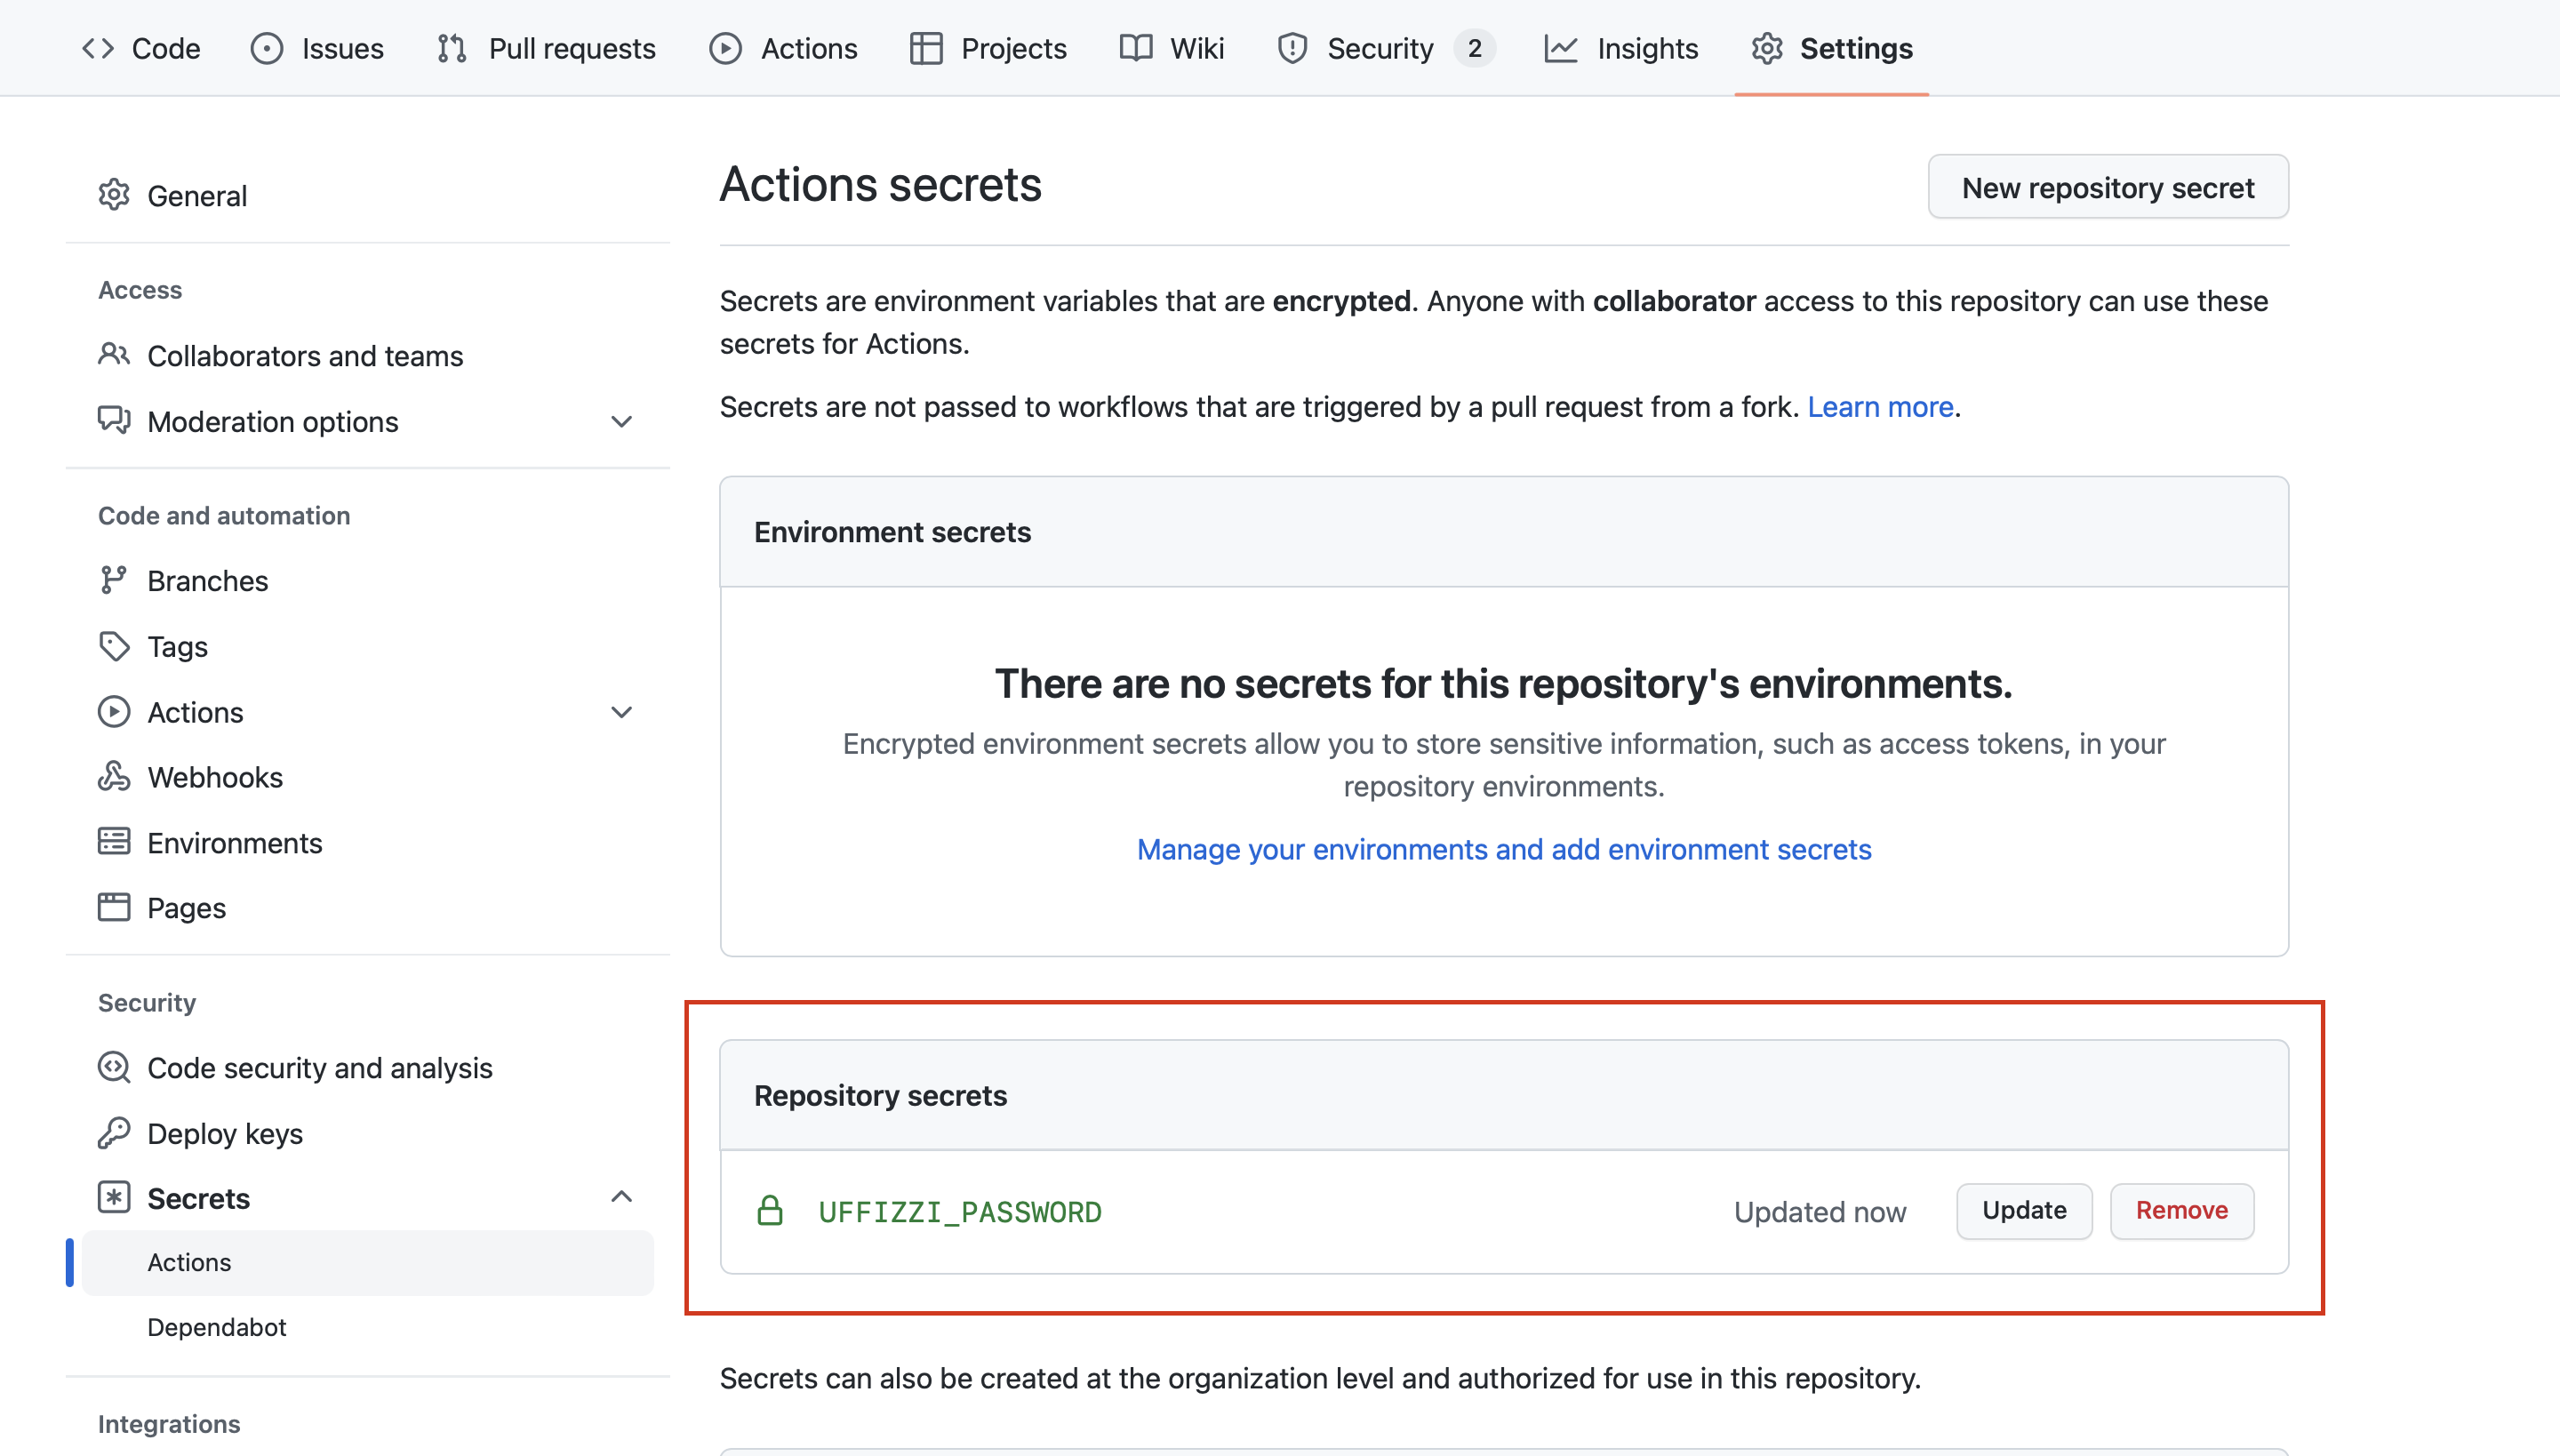
Once your secret has been added, you should see it stored as a new repository secret.
UFFIZZI_PASSWORD is now available to the reusable workflow via:
That's it! Your pipeline is now configured to use Uffizzi. To test your pipeline, try opening a new pull request.
Uffizzi CI
If you're using Uffizzi CI, you will need to link to the Docker Compose template in your GitHub repository from the Uffizzi Dashboard. If you haven't already done so, sign up at Uffizzi Cloud, and then follow the steps to set up your account.
1. Connect to GitHub and your container registries
In Step 3 of 4 of the account setup guide, you are asked to connect to various external services. Select Sign in to GitHub to install the Uffizzi app in your GitHub account, then grant Uffizzi access to the repositories you want to deploy. If the Docker Compose template you created in Section 1 references images stored in a private container registry, add those credentials in this step, as indicated in the screenshot below:
If you need to make changes to your GitHub credentials in the Uffizzi Dashboard, navigate to Settings > Integrations > GitHub > CONFIGURE/DISCONNECT.
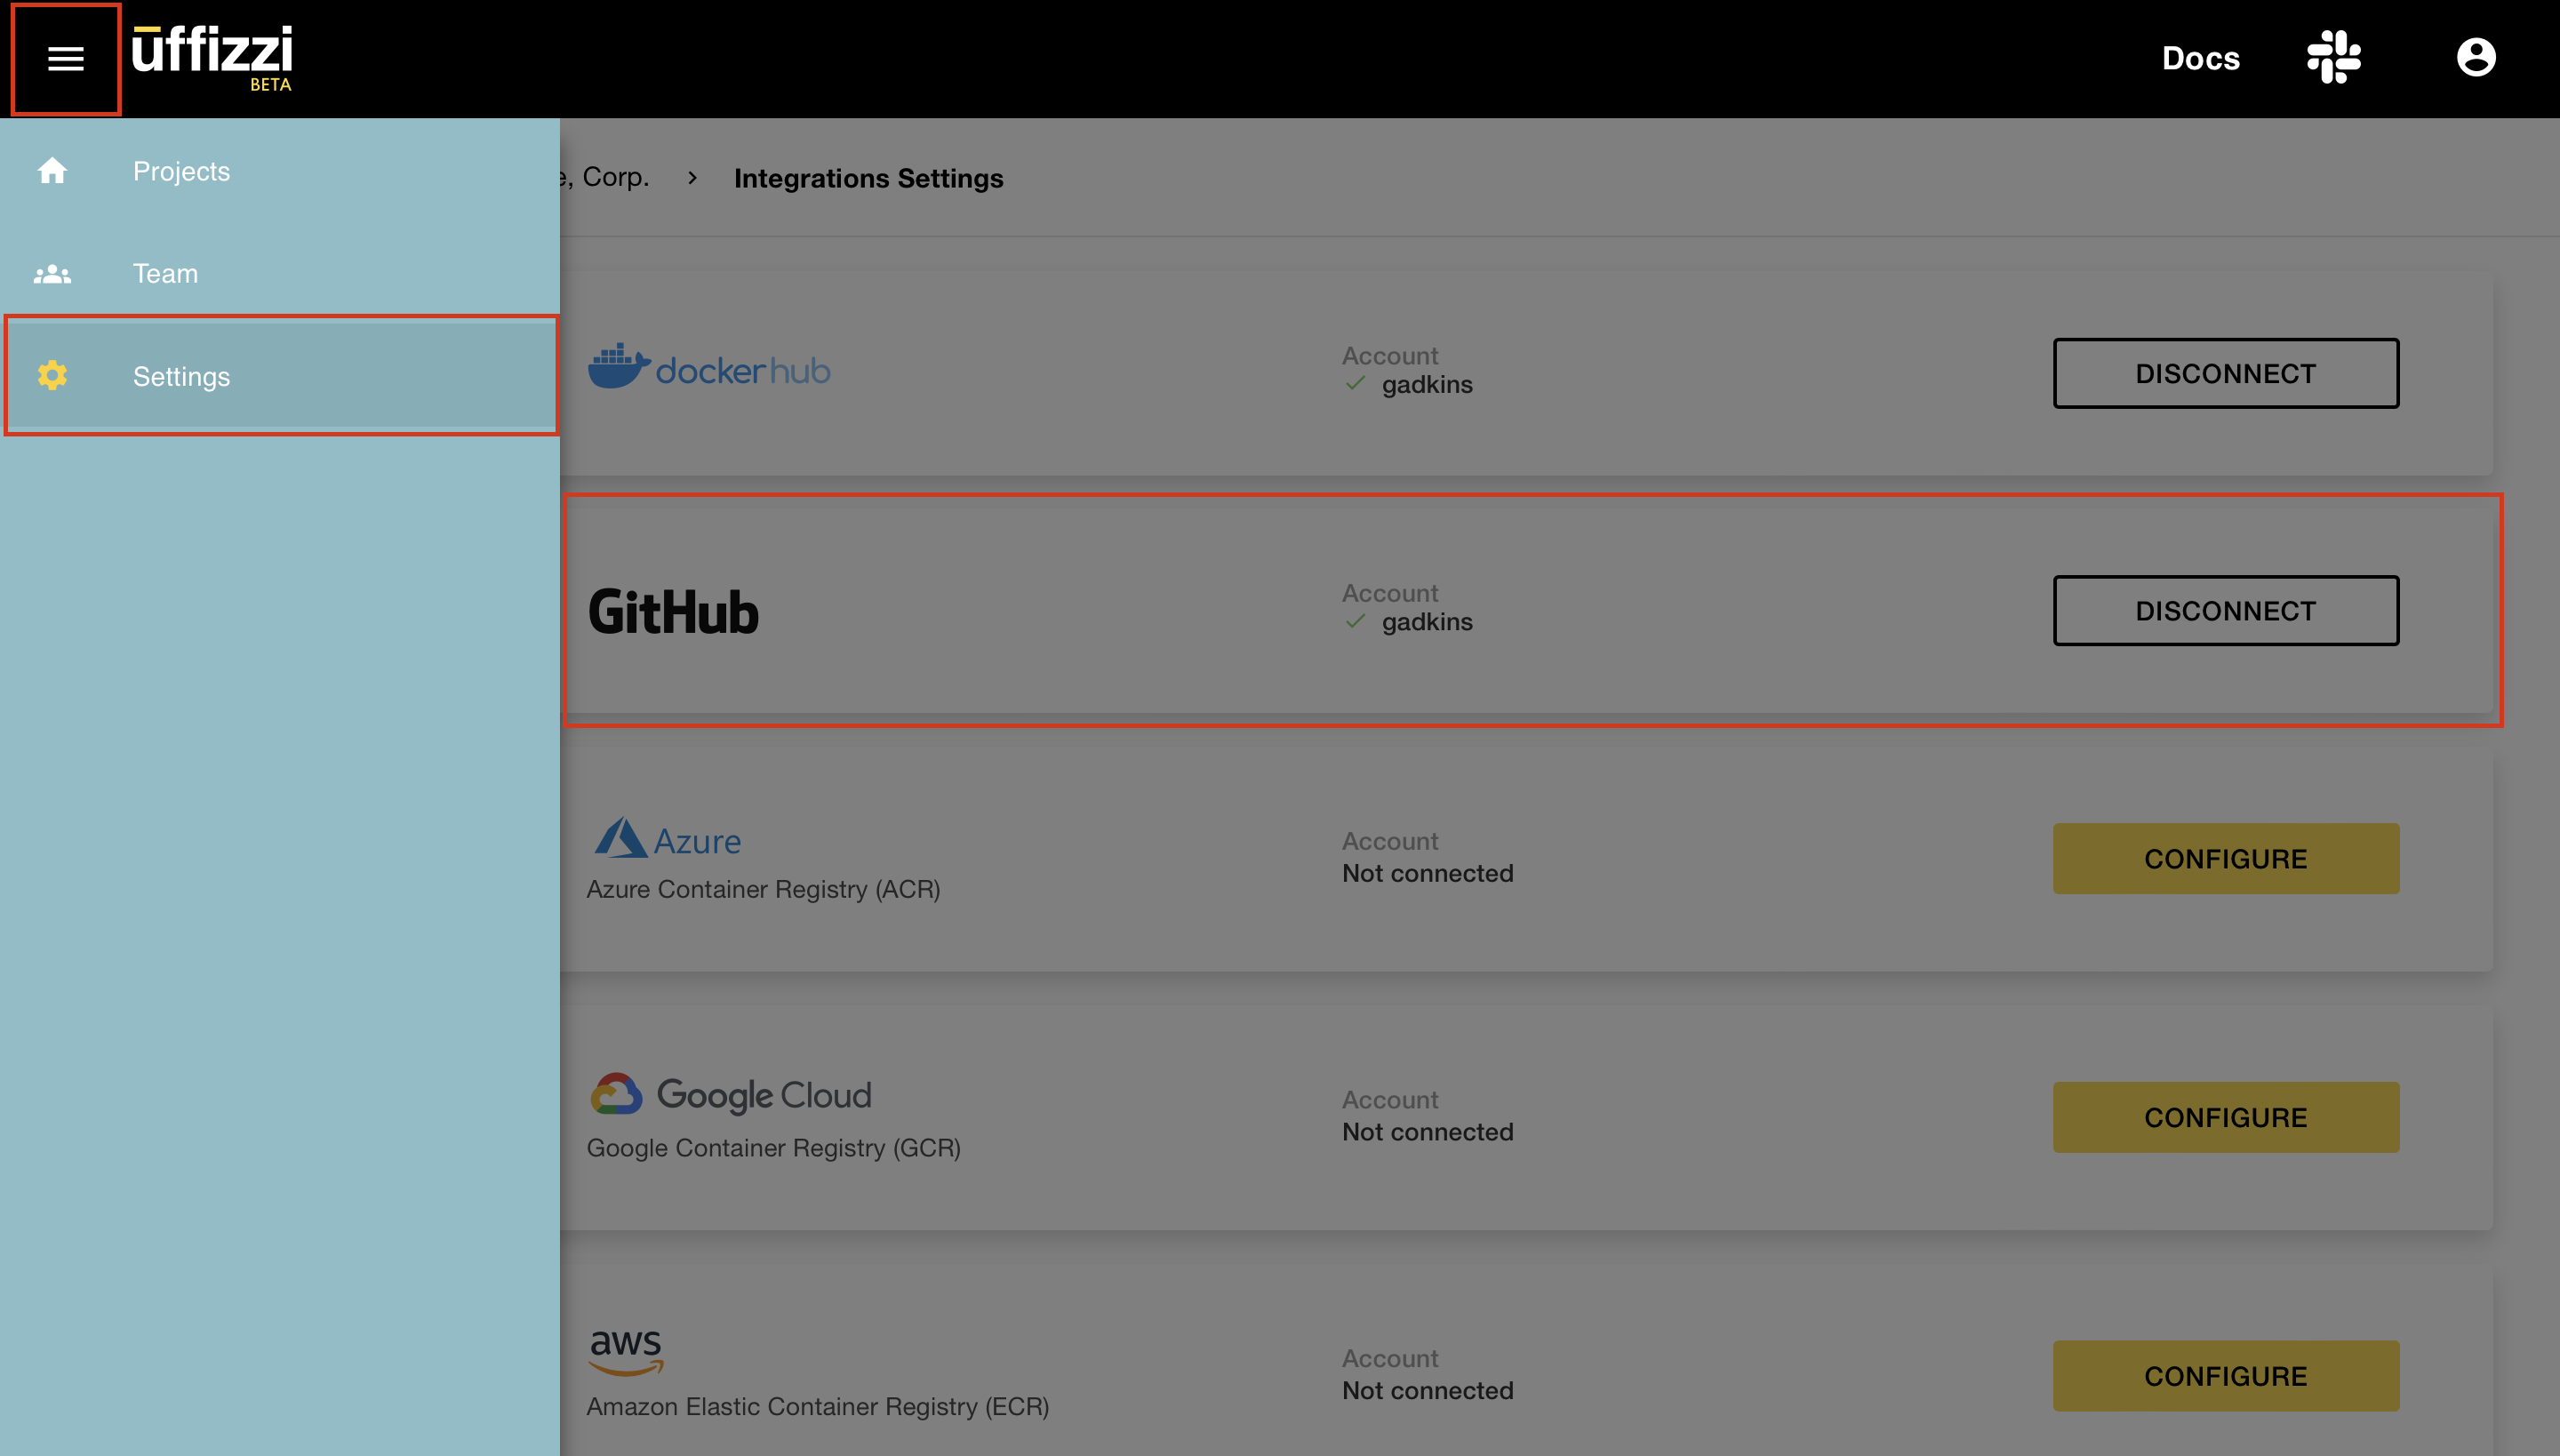
Similarly, you can manage the Uffizzi app installation from GitHub by navigating to Settings > Applications > Uffizzi Cloud > Configure

2. Add application secrets
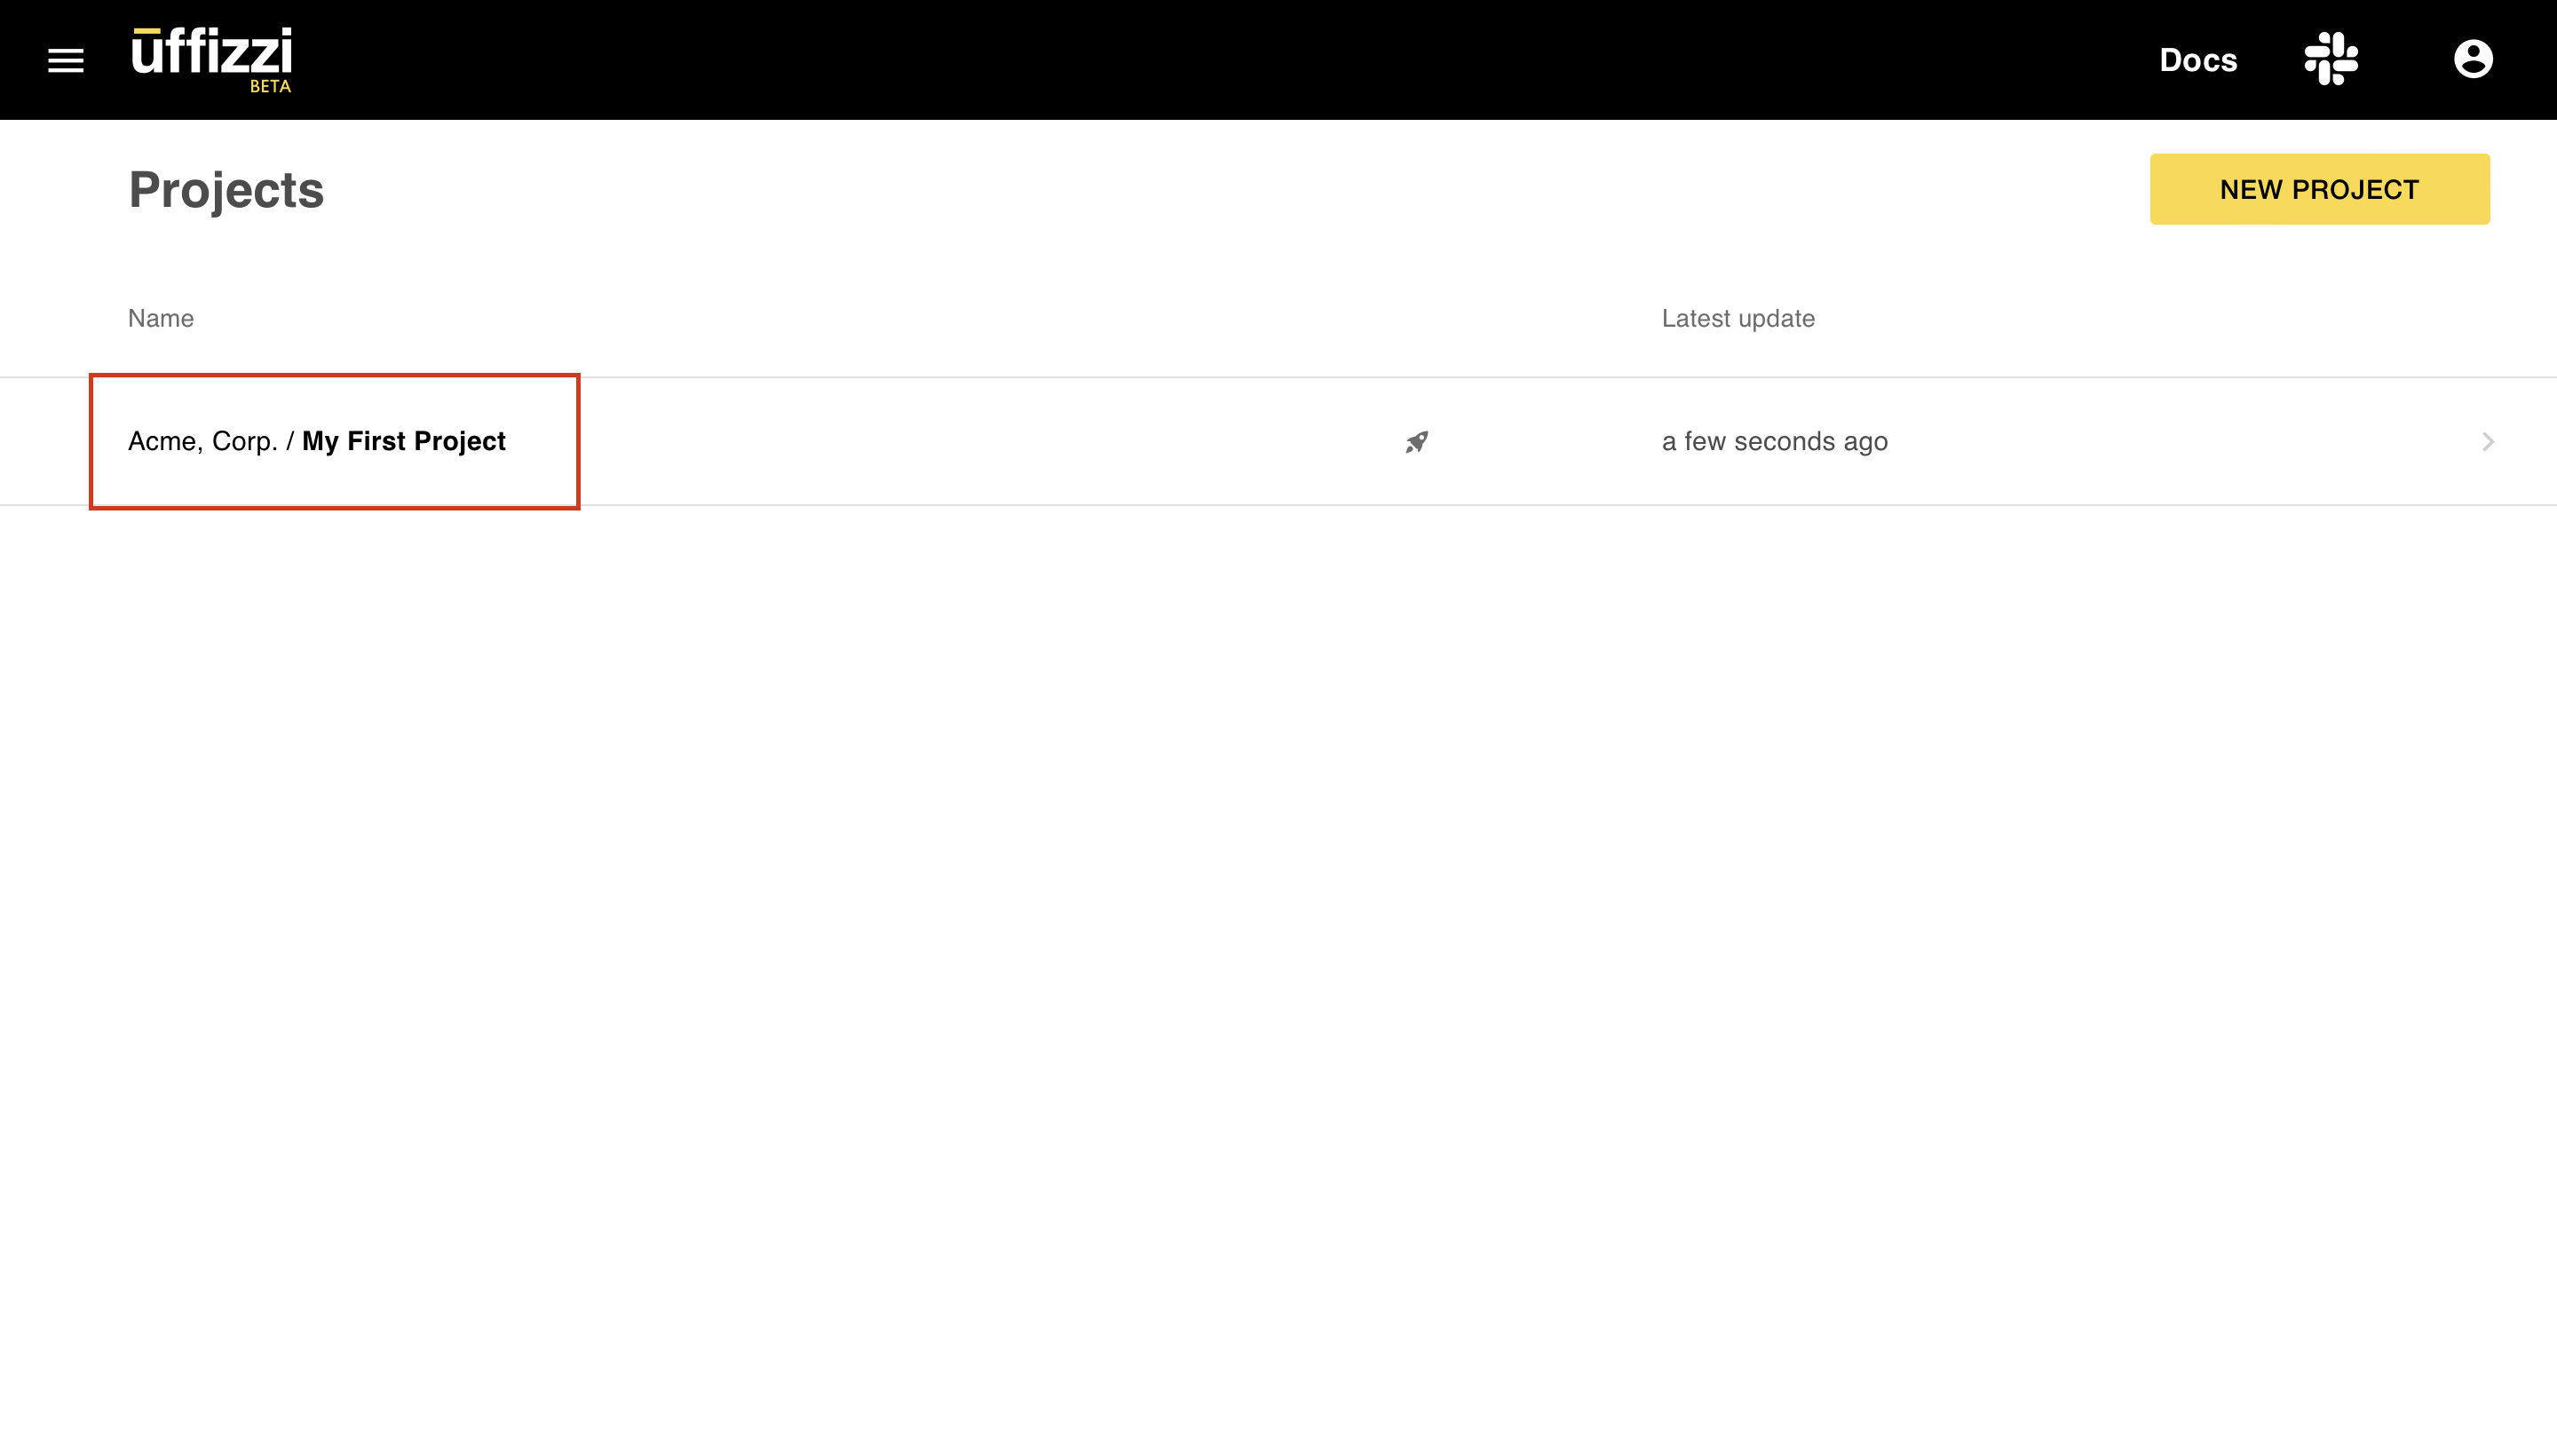
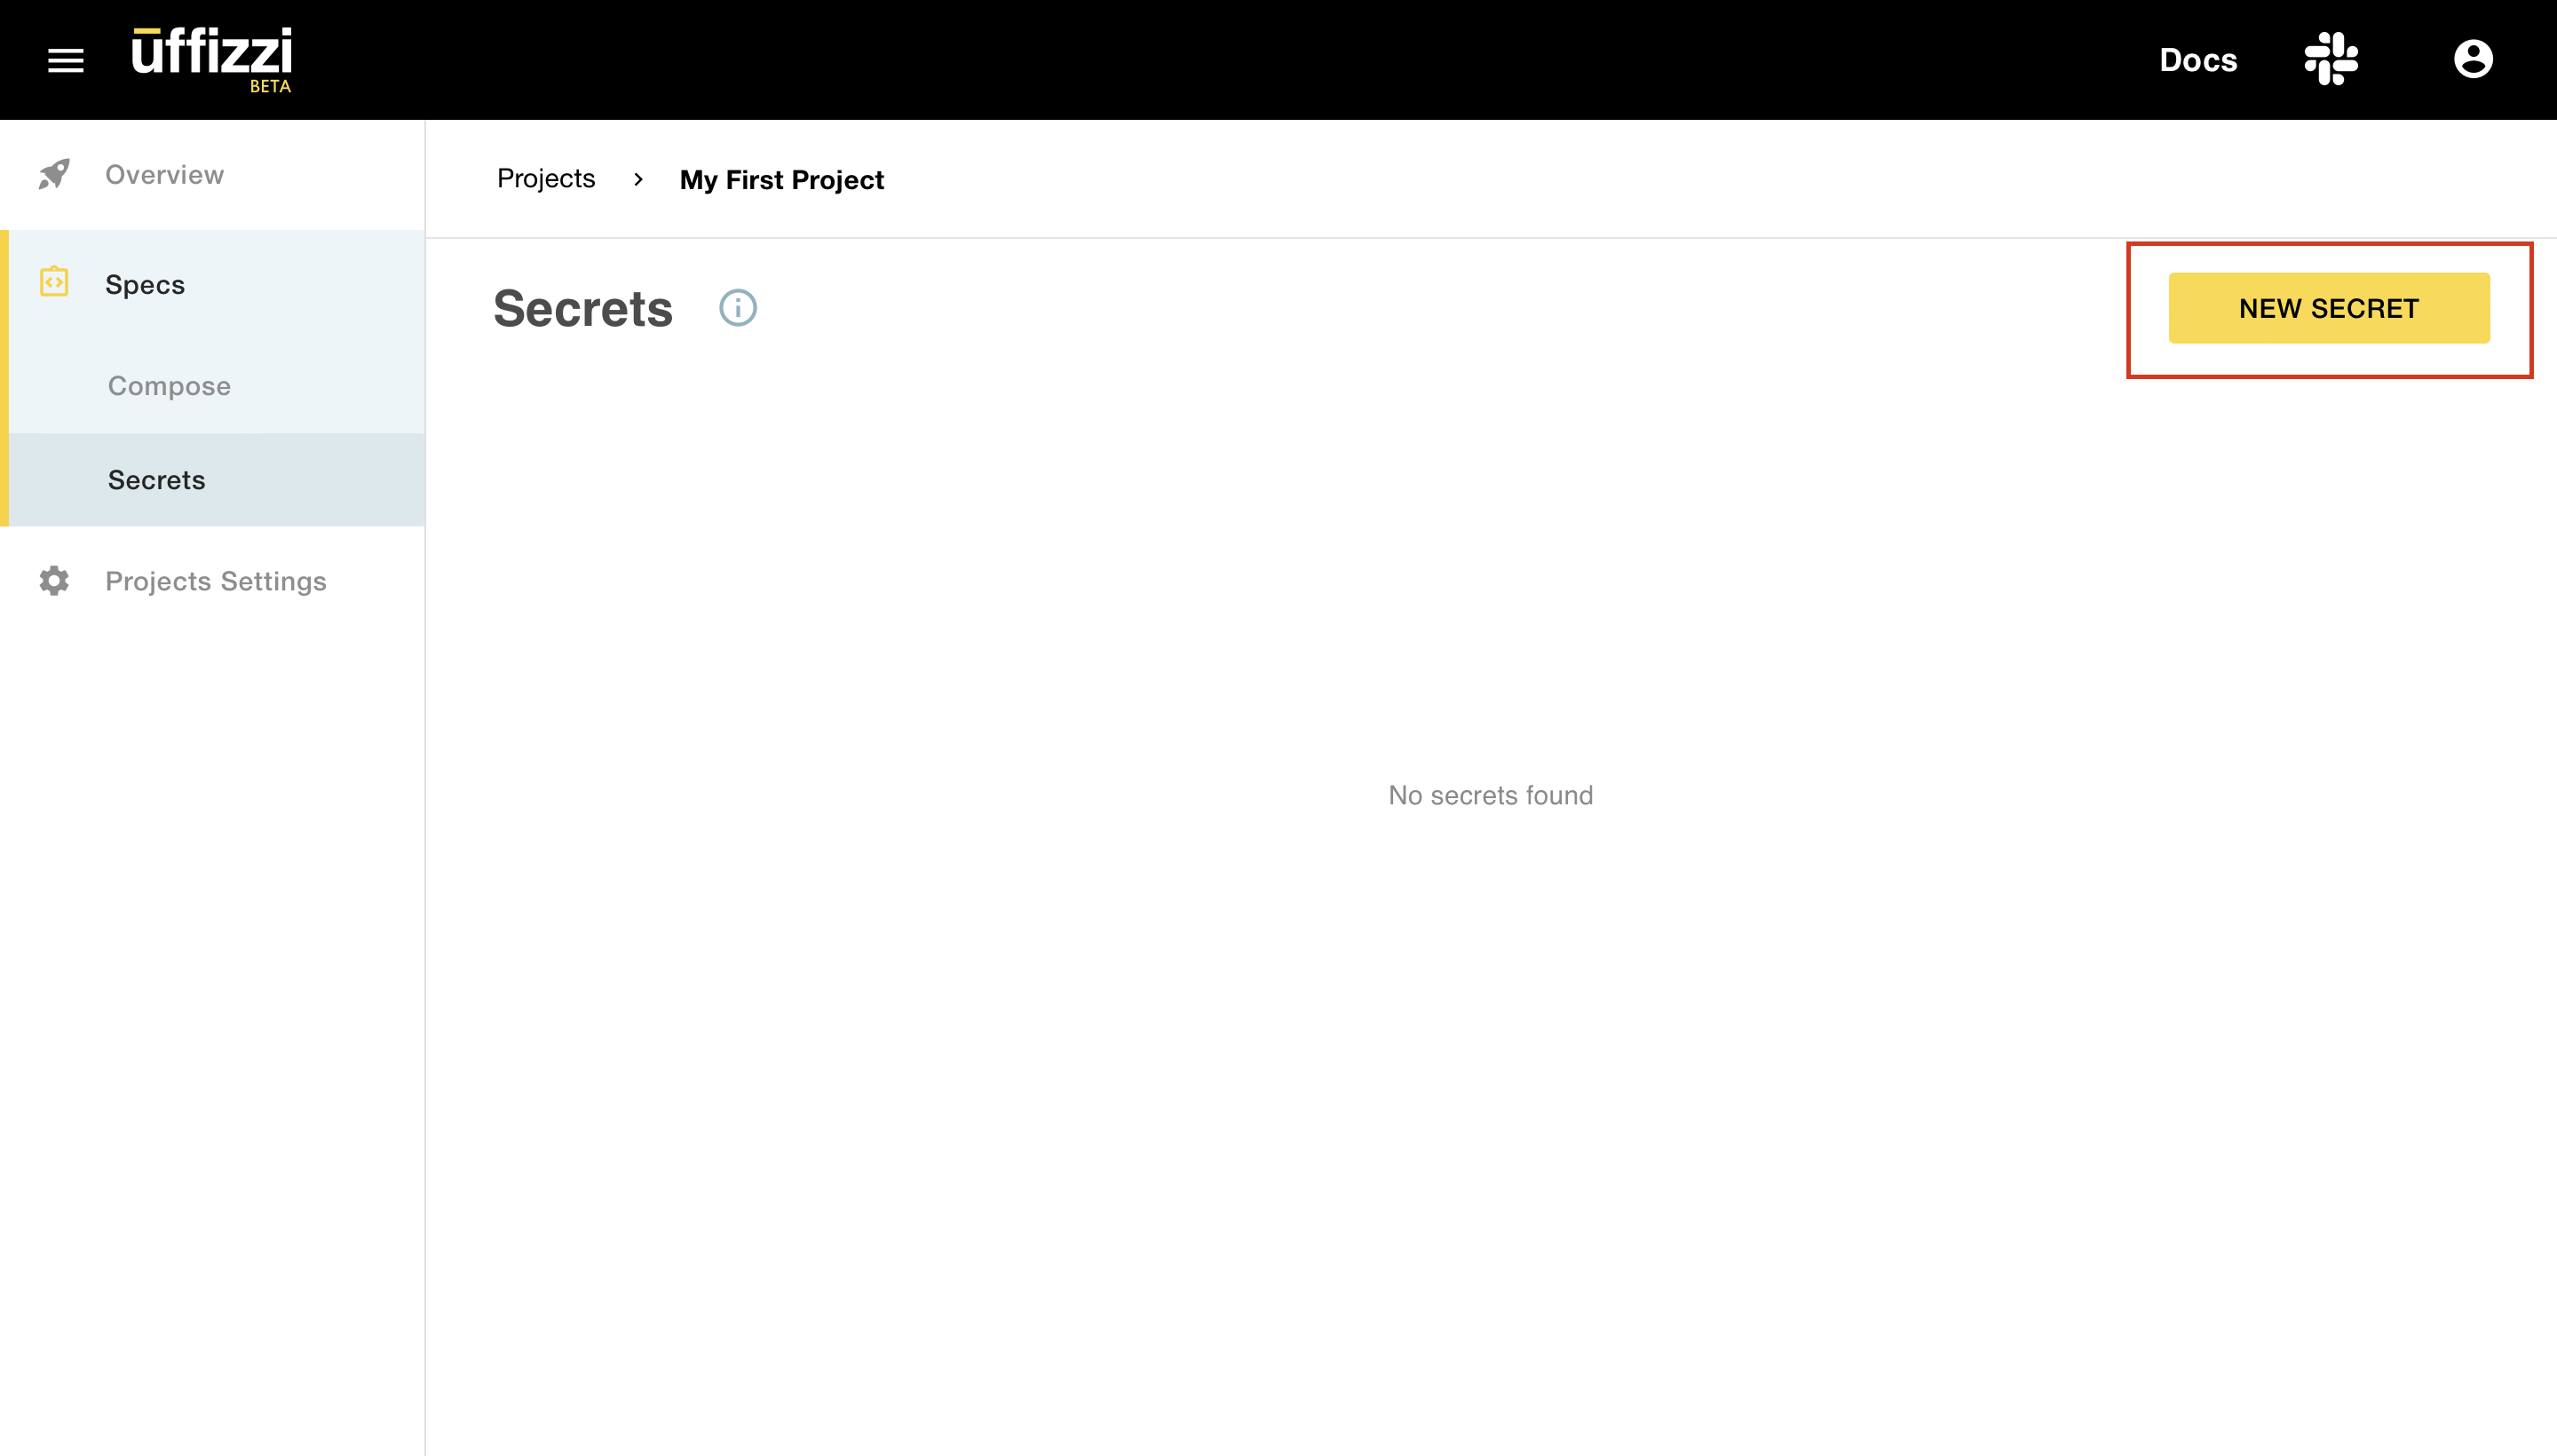
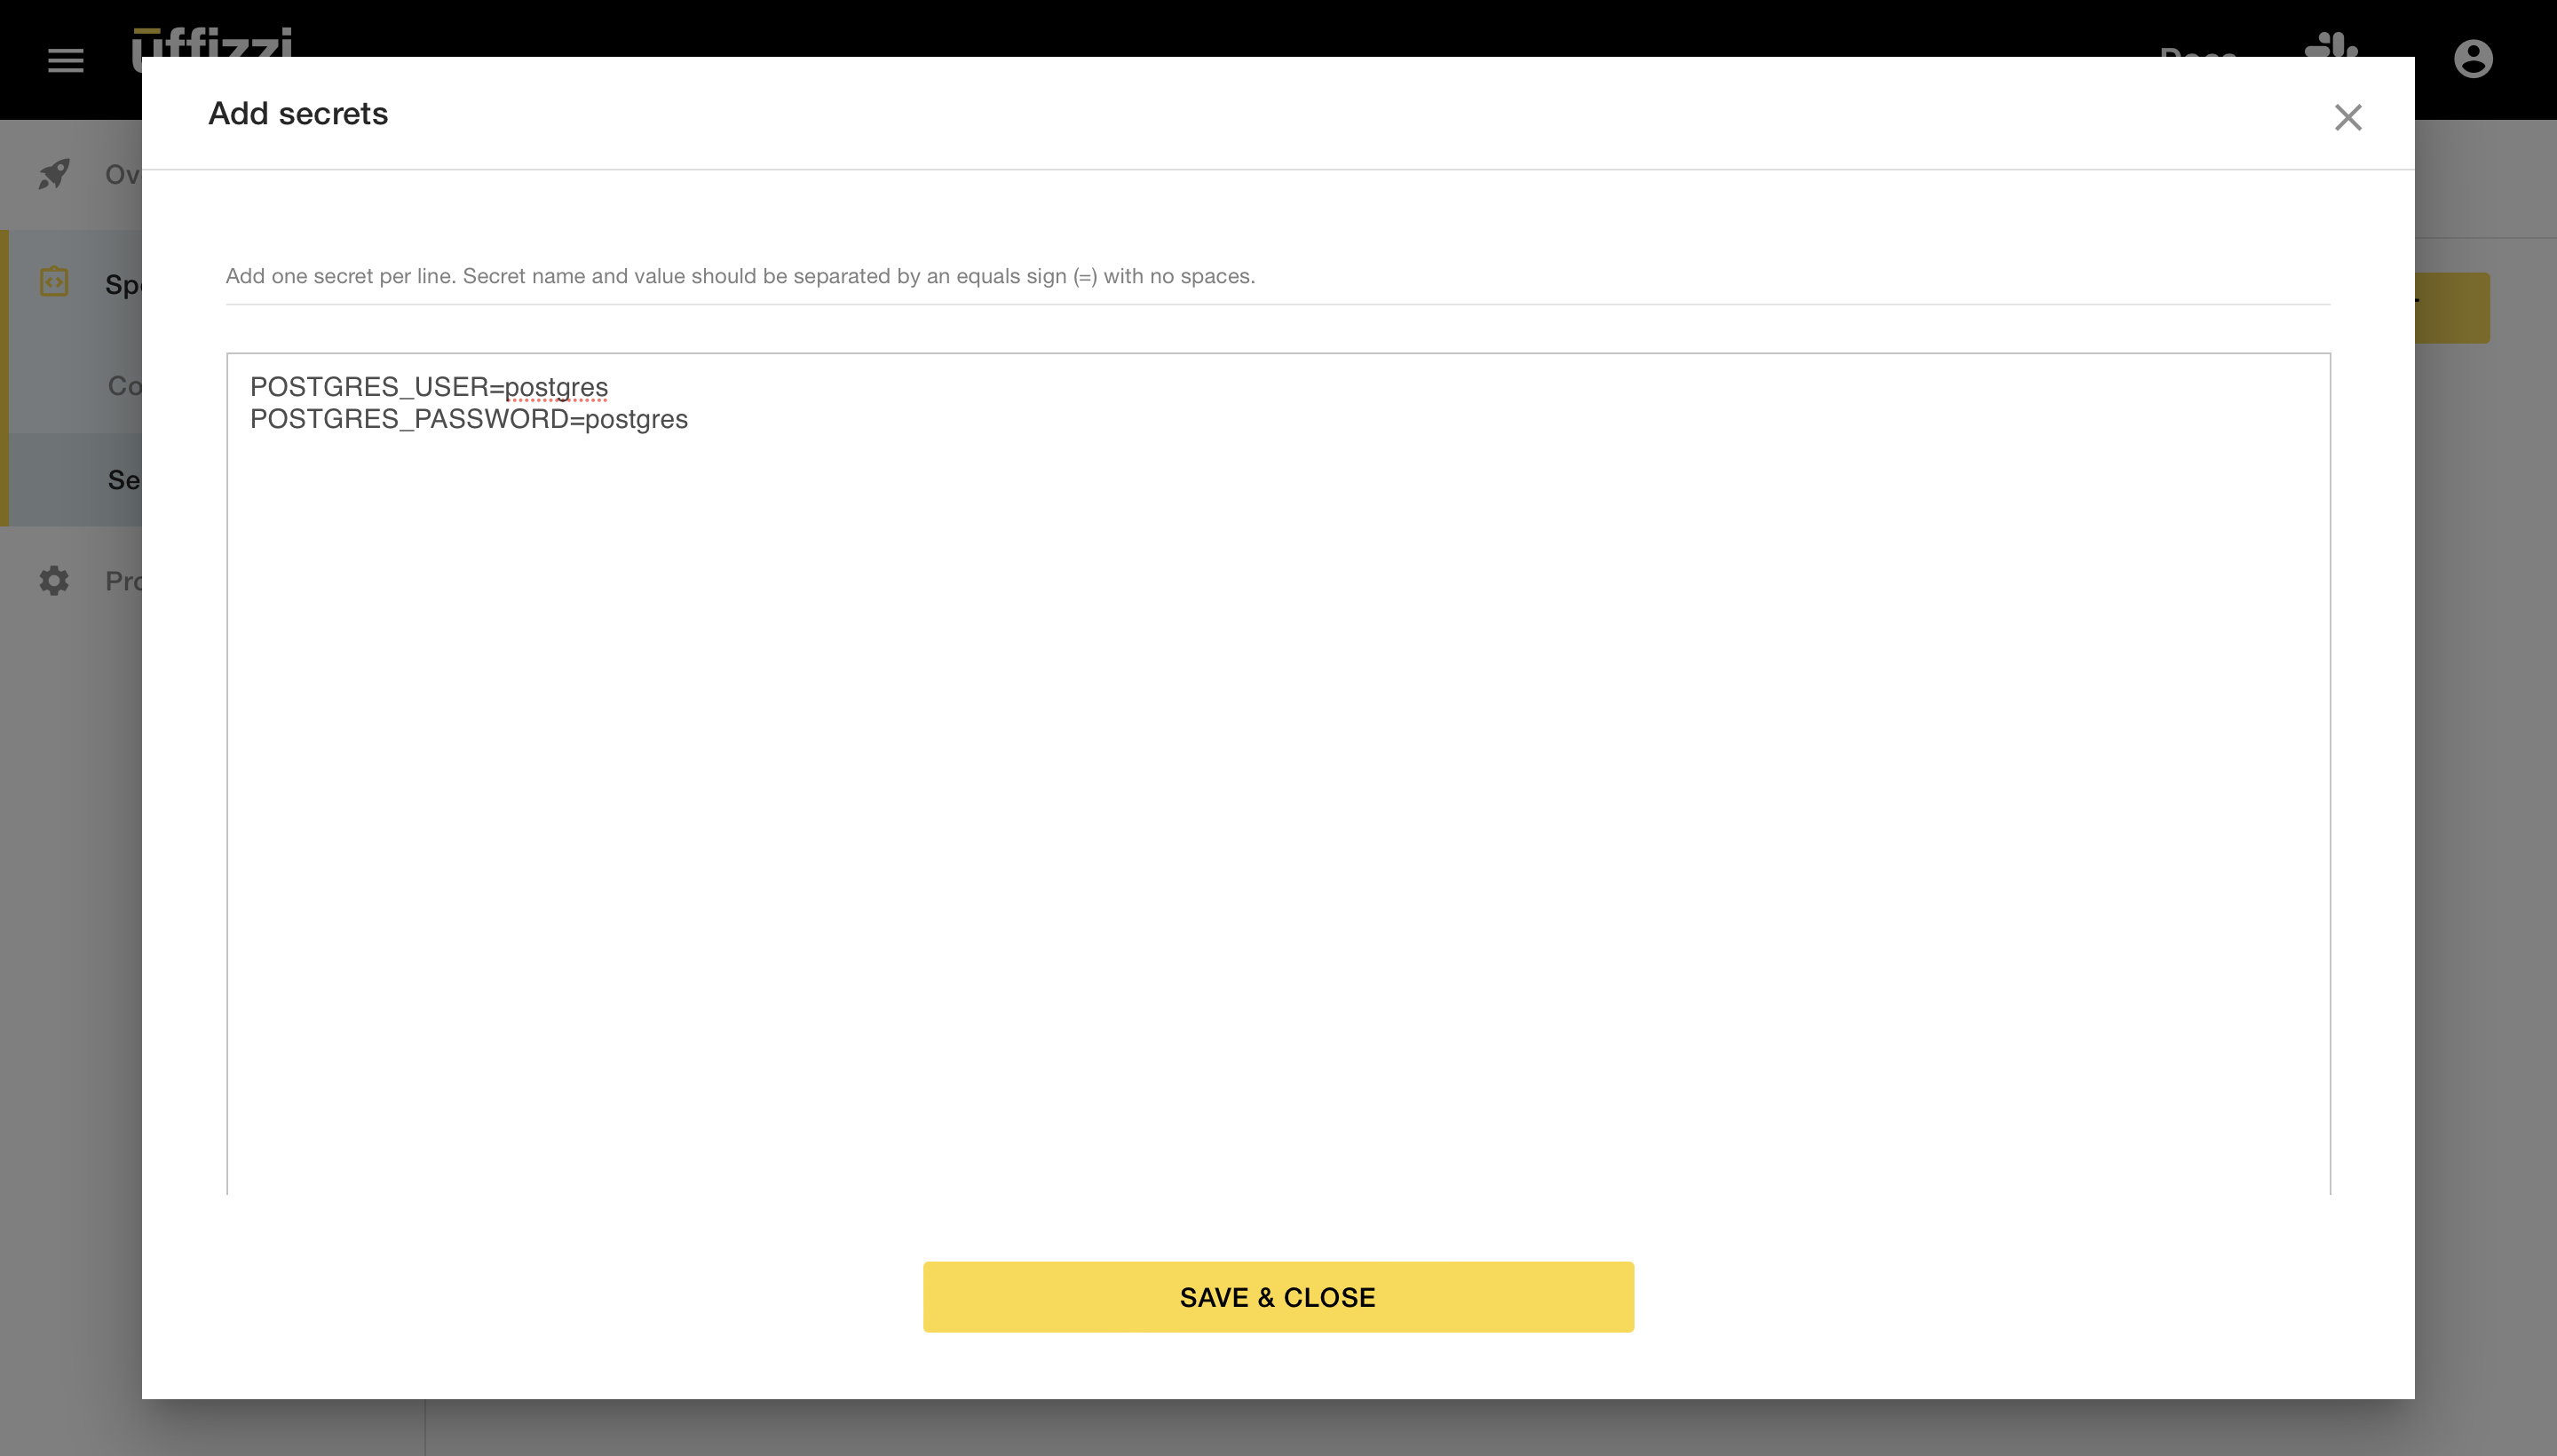
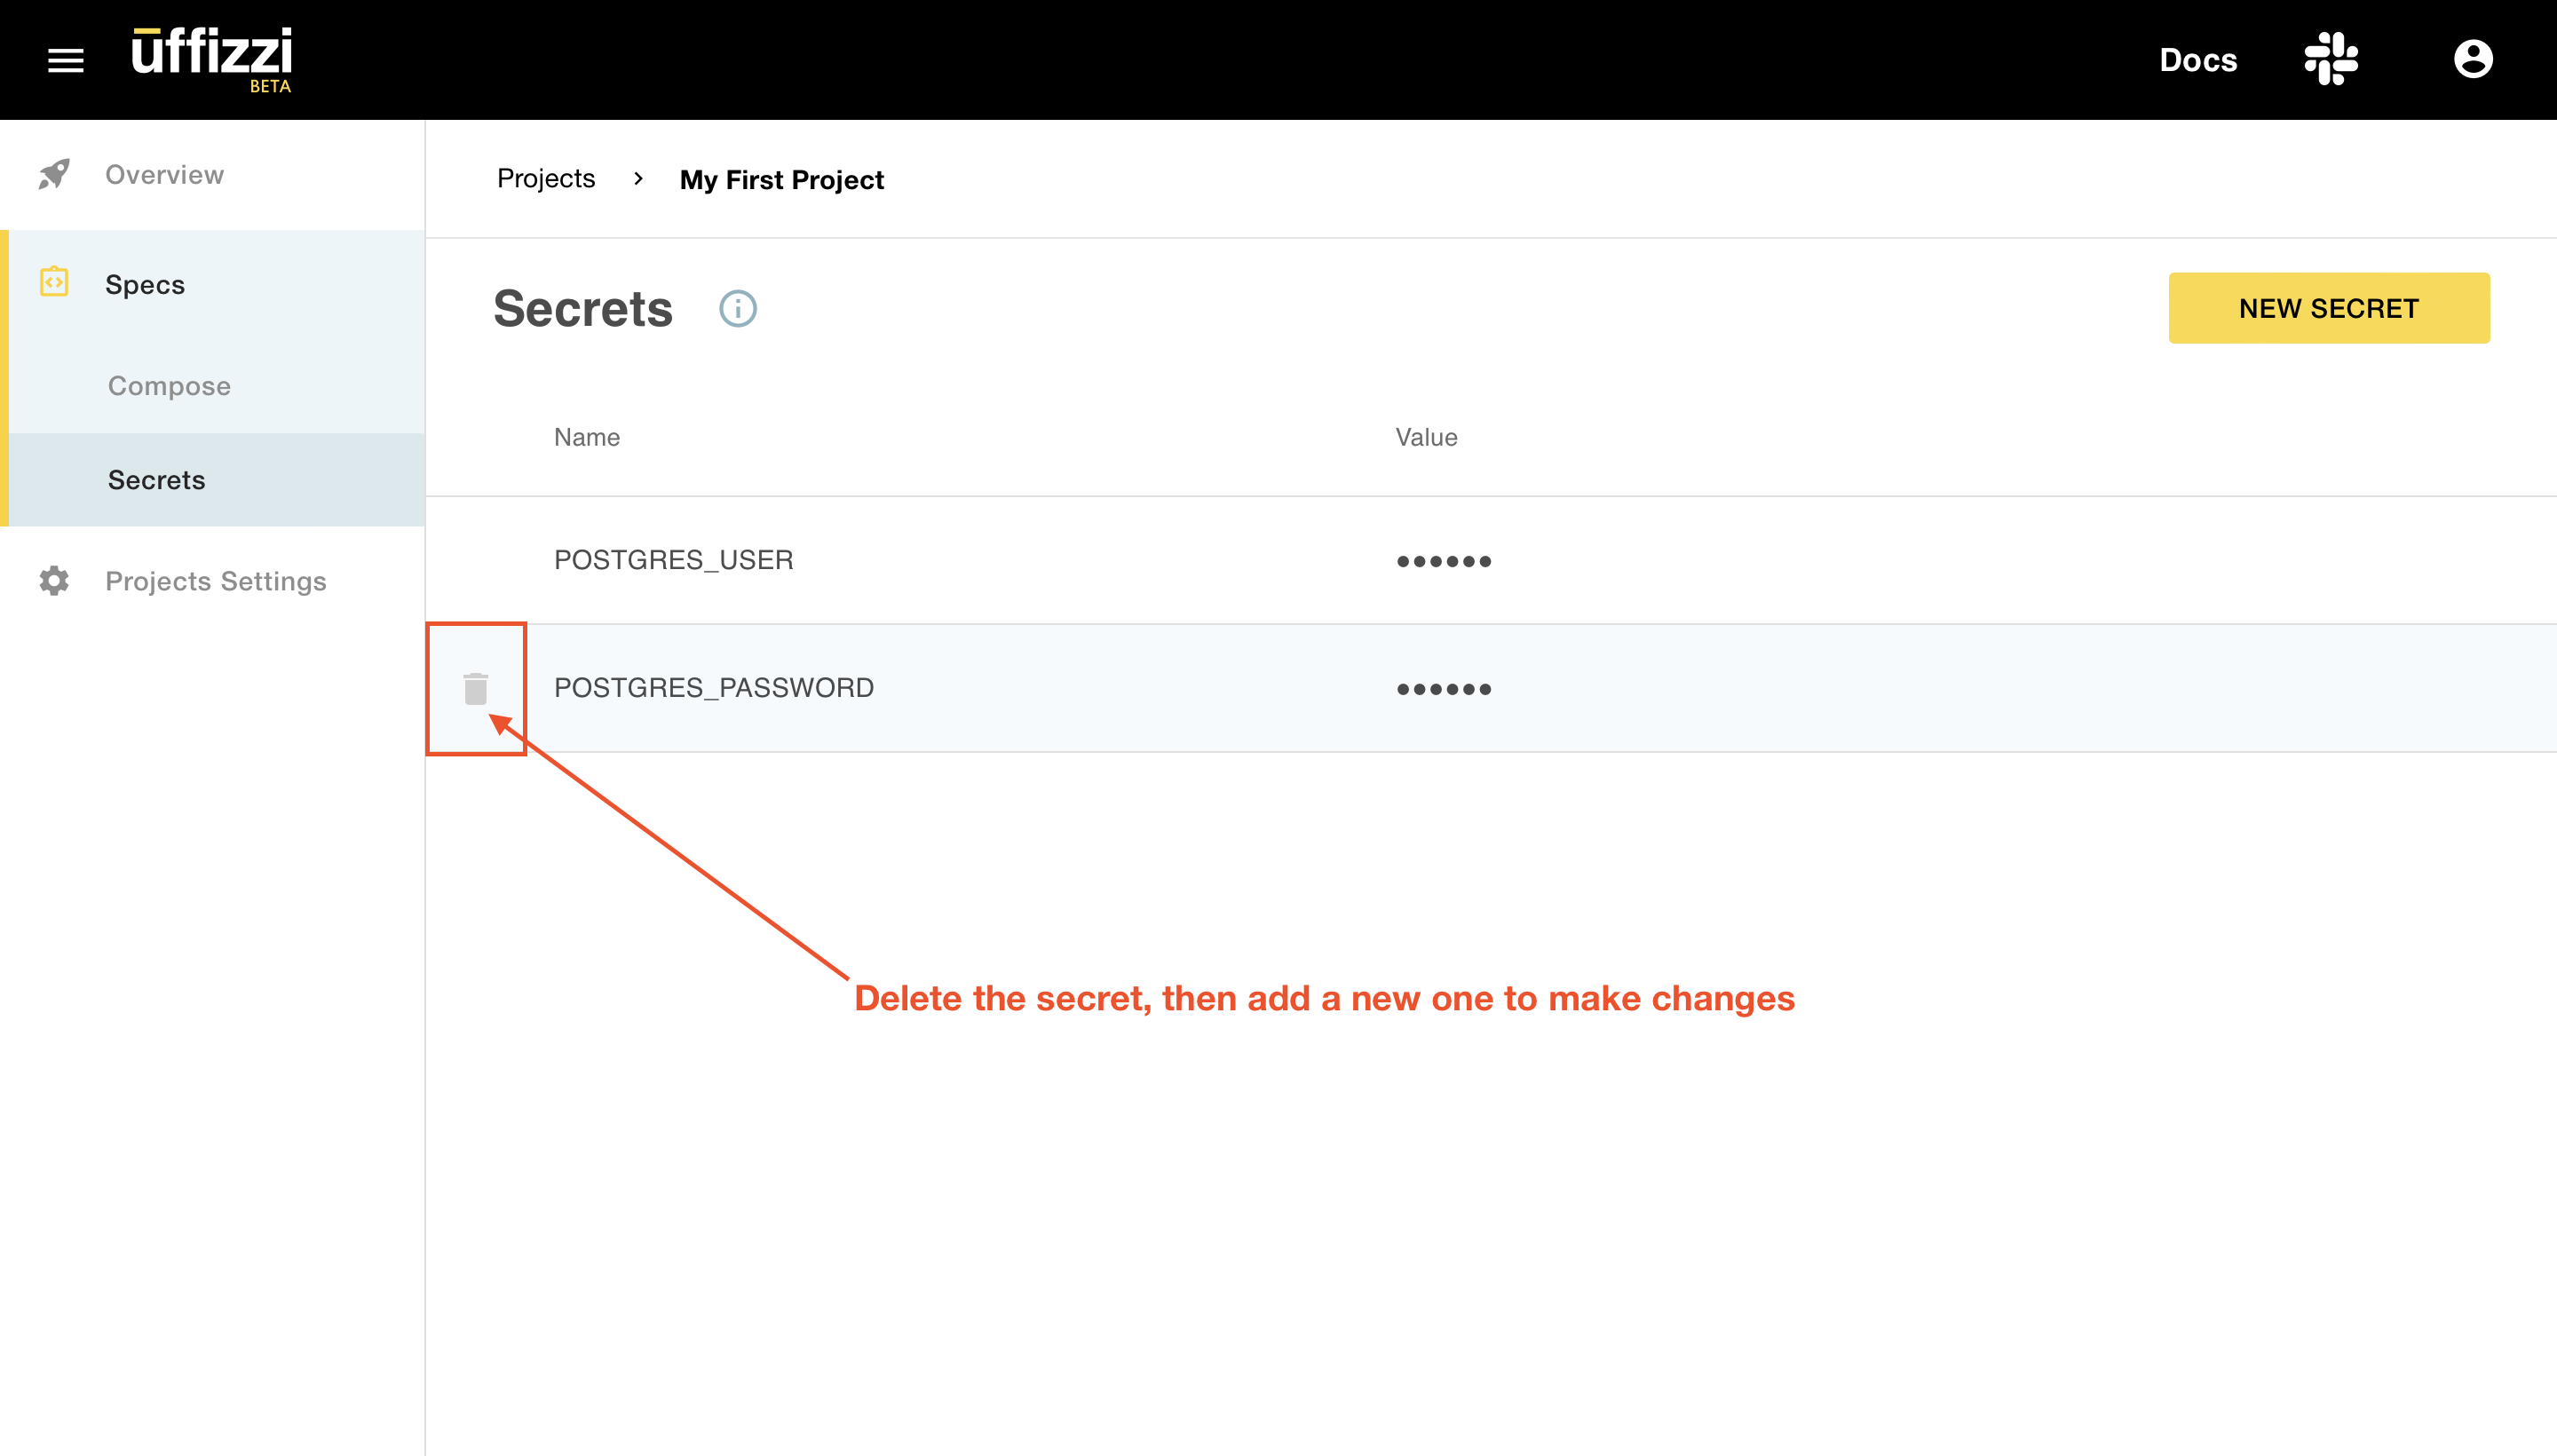
If your compose file includes [application secrets](https://docs.uffizzi.com/references/compose-spec/#secrets), such as database credentials, you can add them in the Uffizzi Dashboard. Navigate to your project, then select Specs > Secrets > NEW SECRET. This will open a modal, where you can input your secrets as NAME=VALUE pairs. Be sure to add one secret per line, separatedy by = with no white spaces.
Once the secrets are saved, you will not be able to view or edit their values. To make changes to a secret, first delete the old secret, then create a new one. To delete a secret, hover over the secret in the list view, then select the delete icon.
3. Link to your Docker Compose template
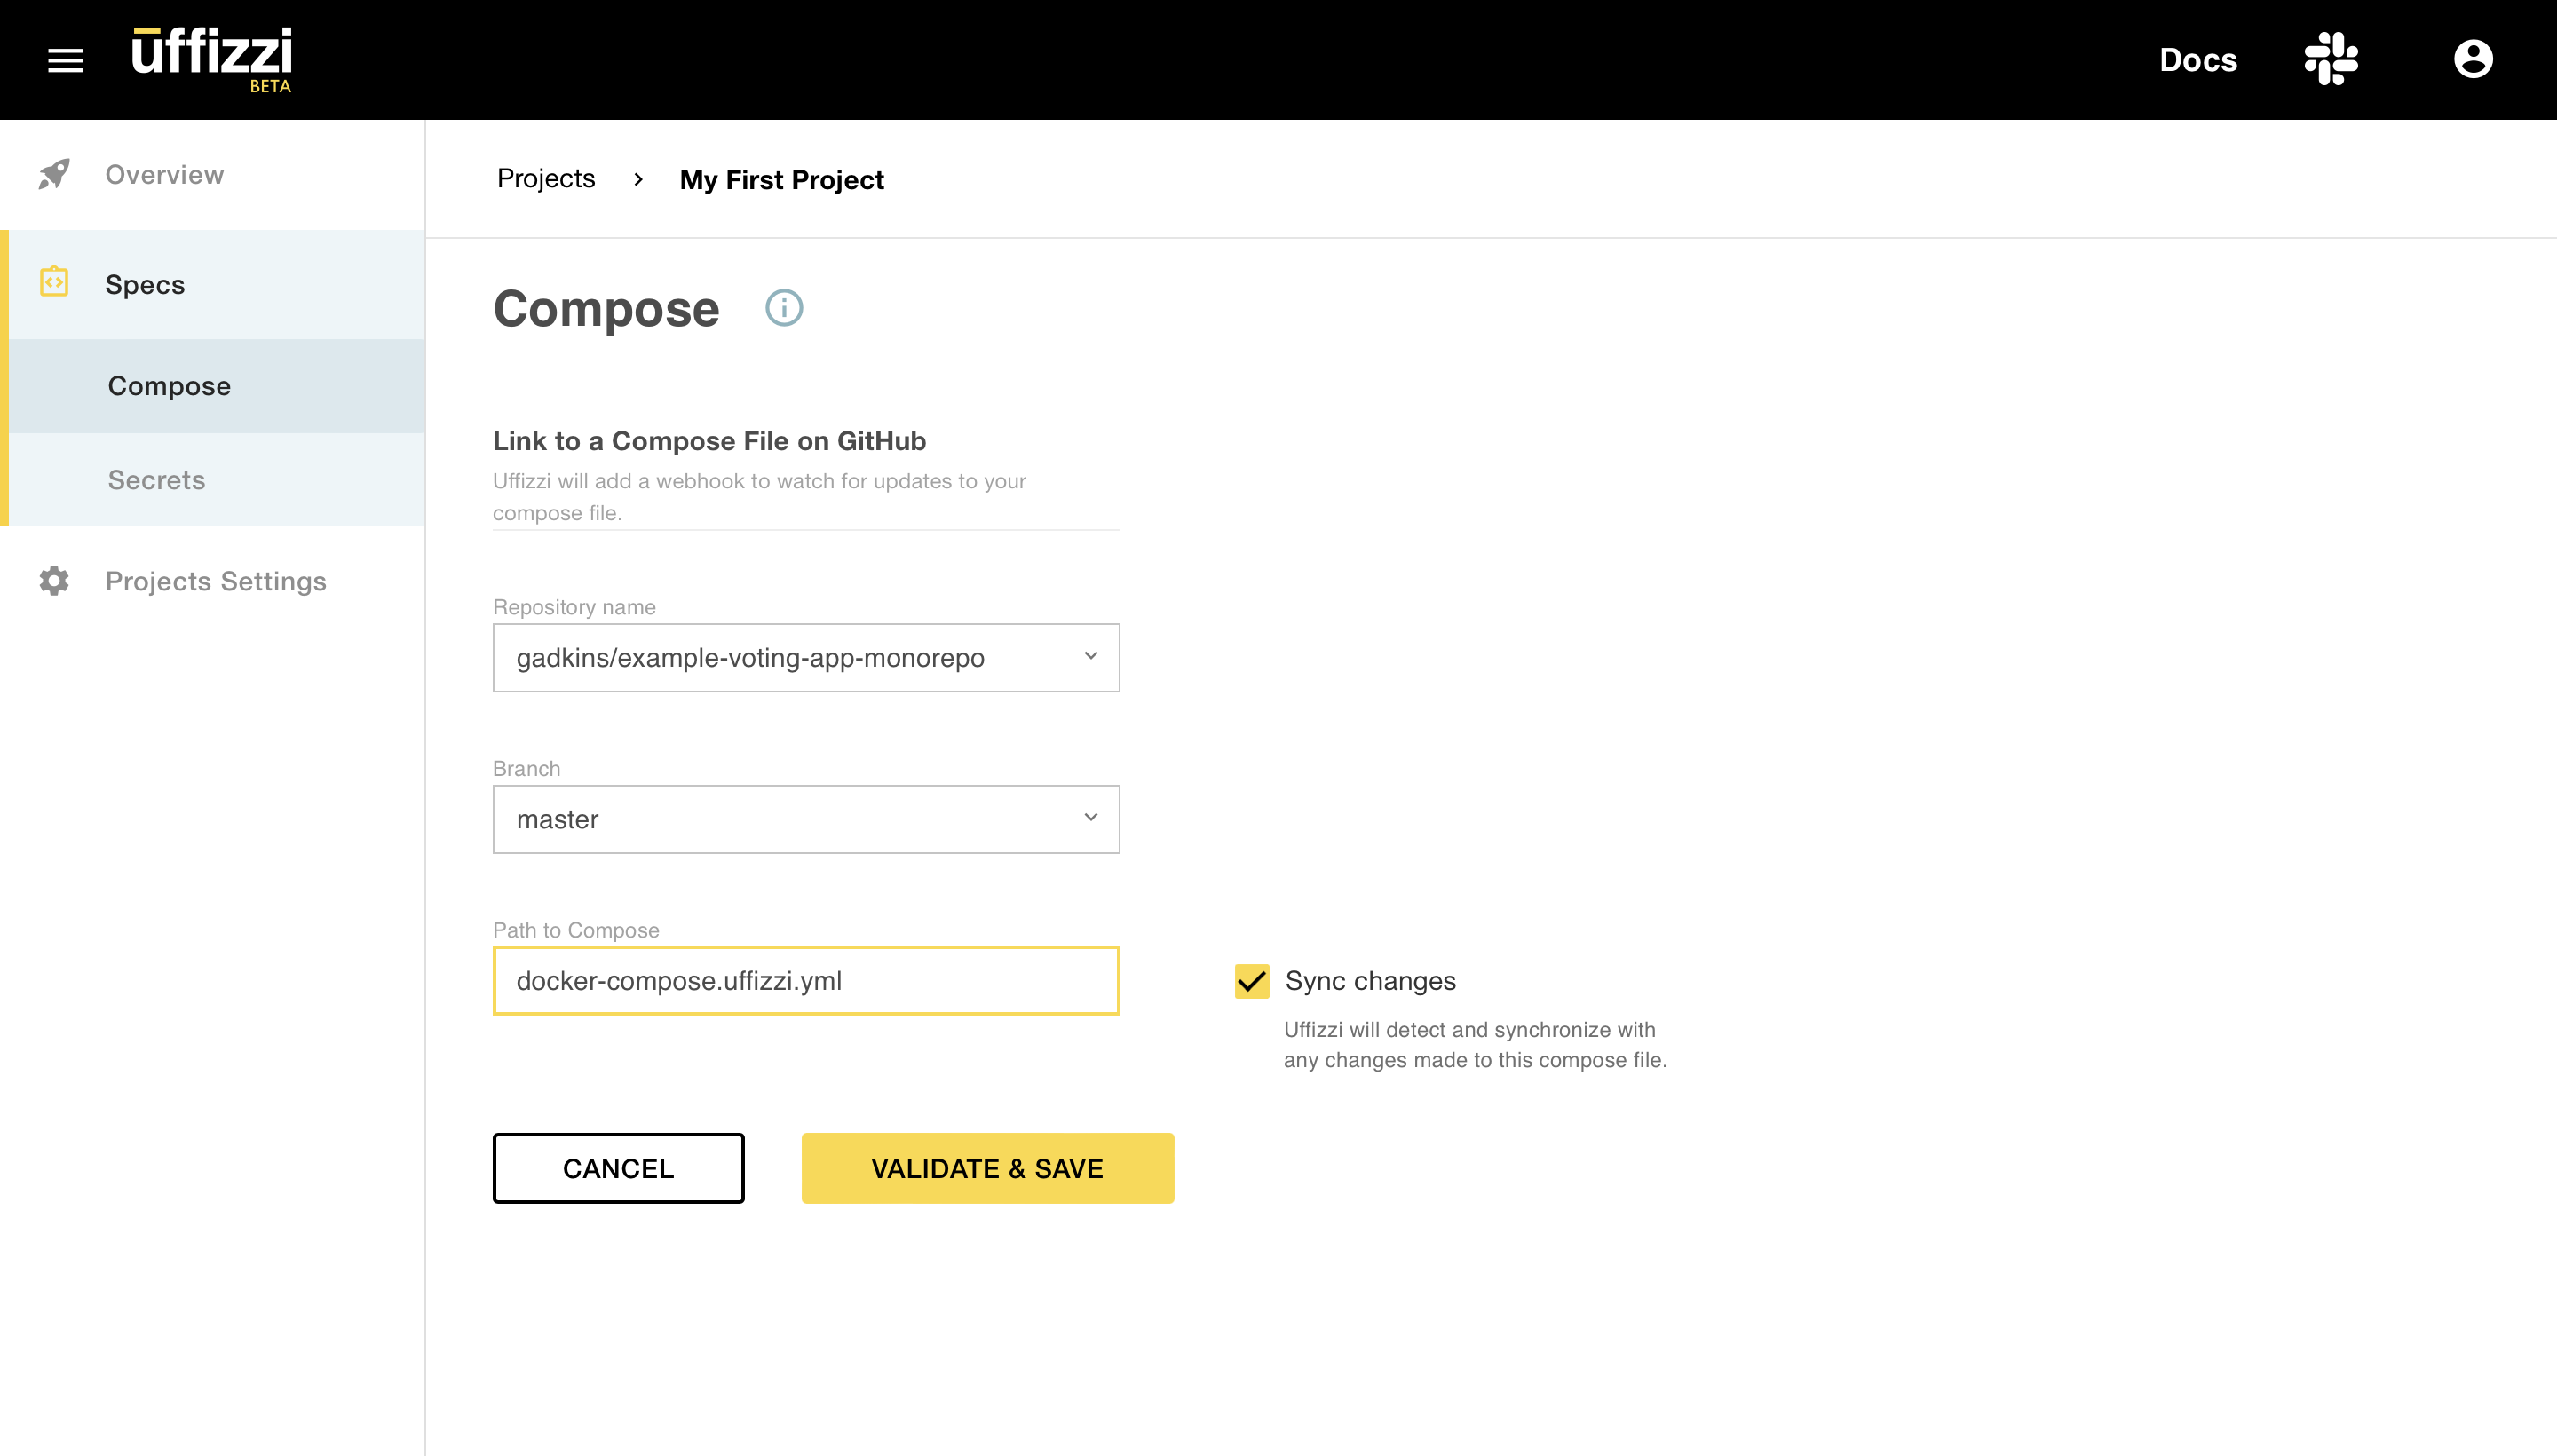
In this final step, we'll link to our Docker Compose template that's stored in our GitHub repository. To do this, navigate to your project, then select Specs > Compose > NEW COMPOSE. Next, select the repository, branch (typically this is the branch you open pull requests against), and name of the compose file. Finally, select VALIDATE & SAVE.
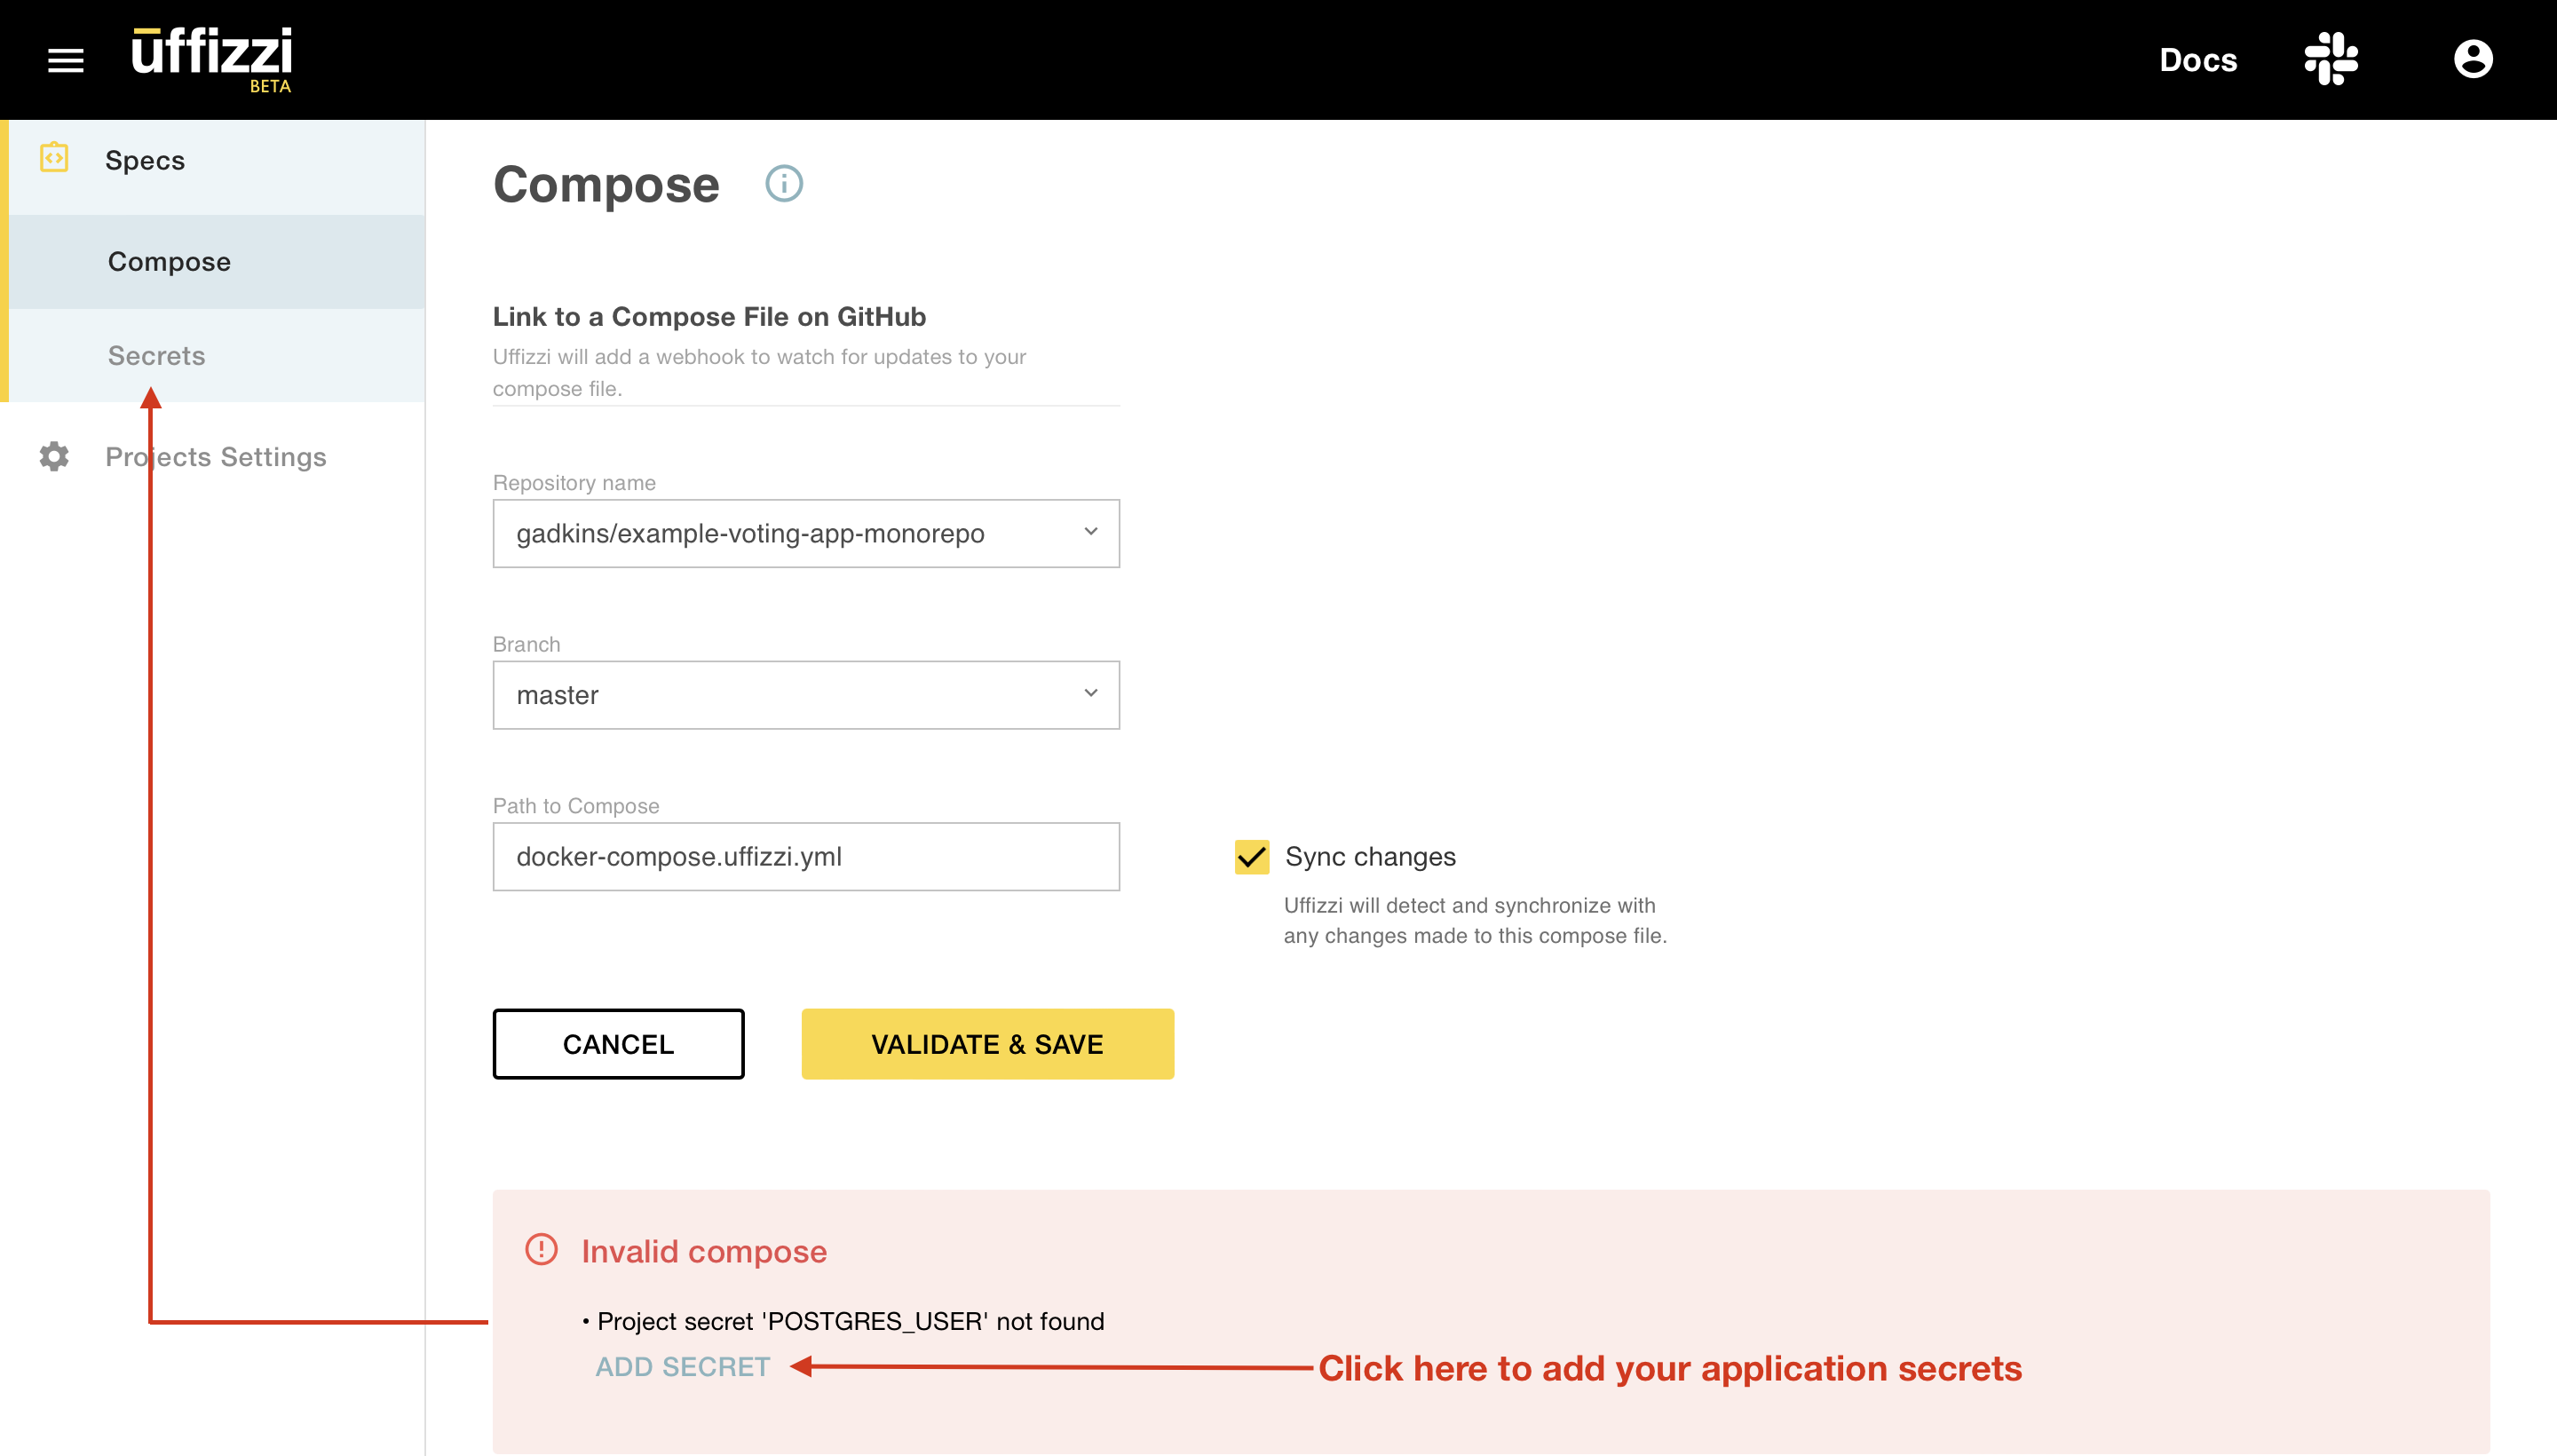
Note, if you did not add your secrets as described in the previous step, you will see a validation error with a link to add your secretes.
Once your compose file has been successfully added, you will see it in the Uffizzi Dashboard with a link to its source on GitHub. Any changes you make to this compose file on GitHub will be synced in the Uffizzi Dashboard.
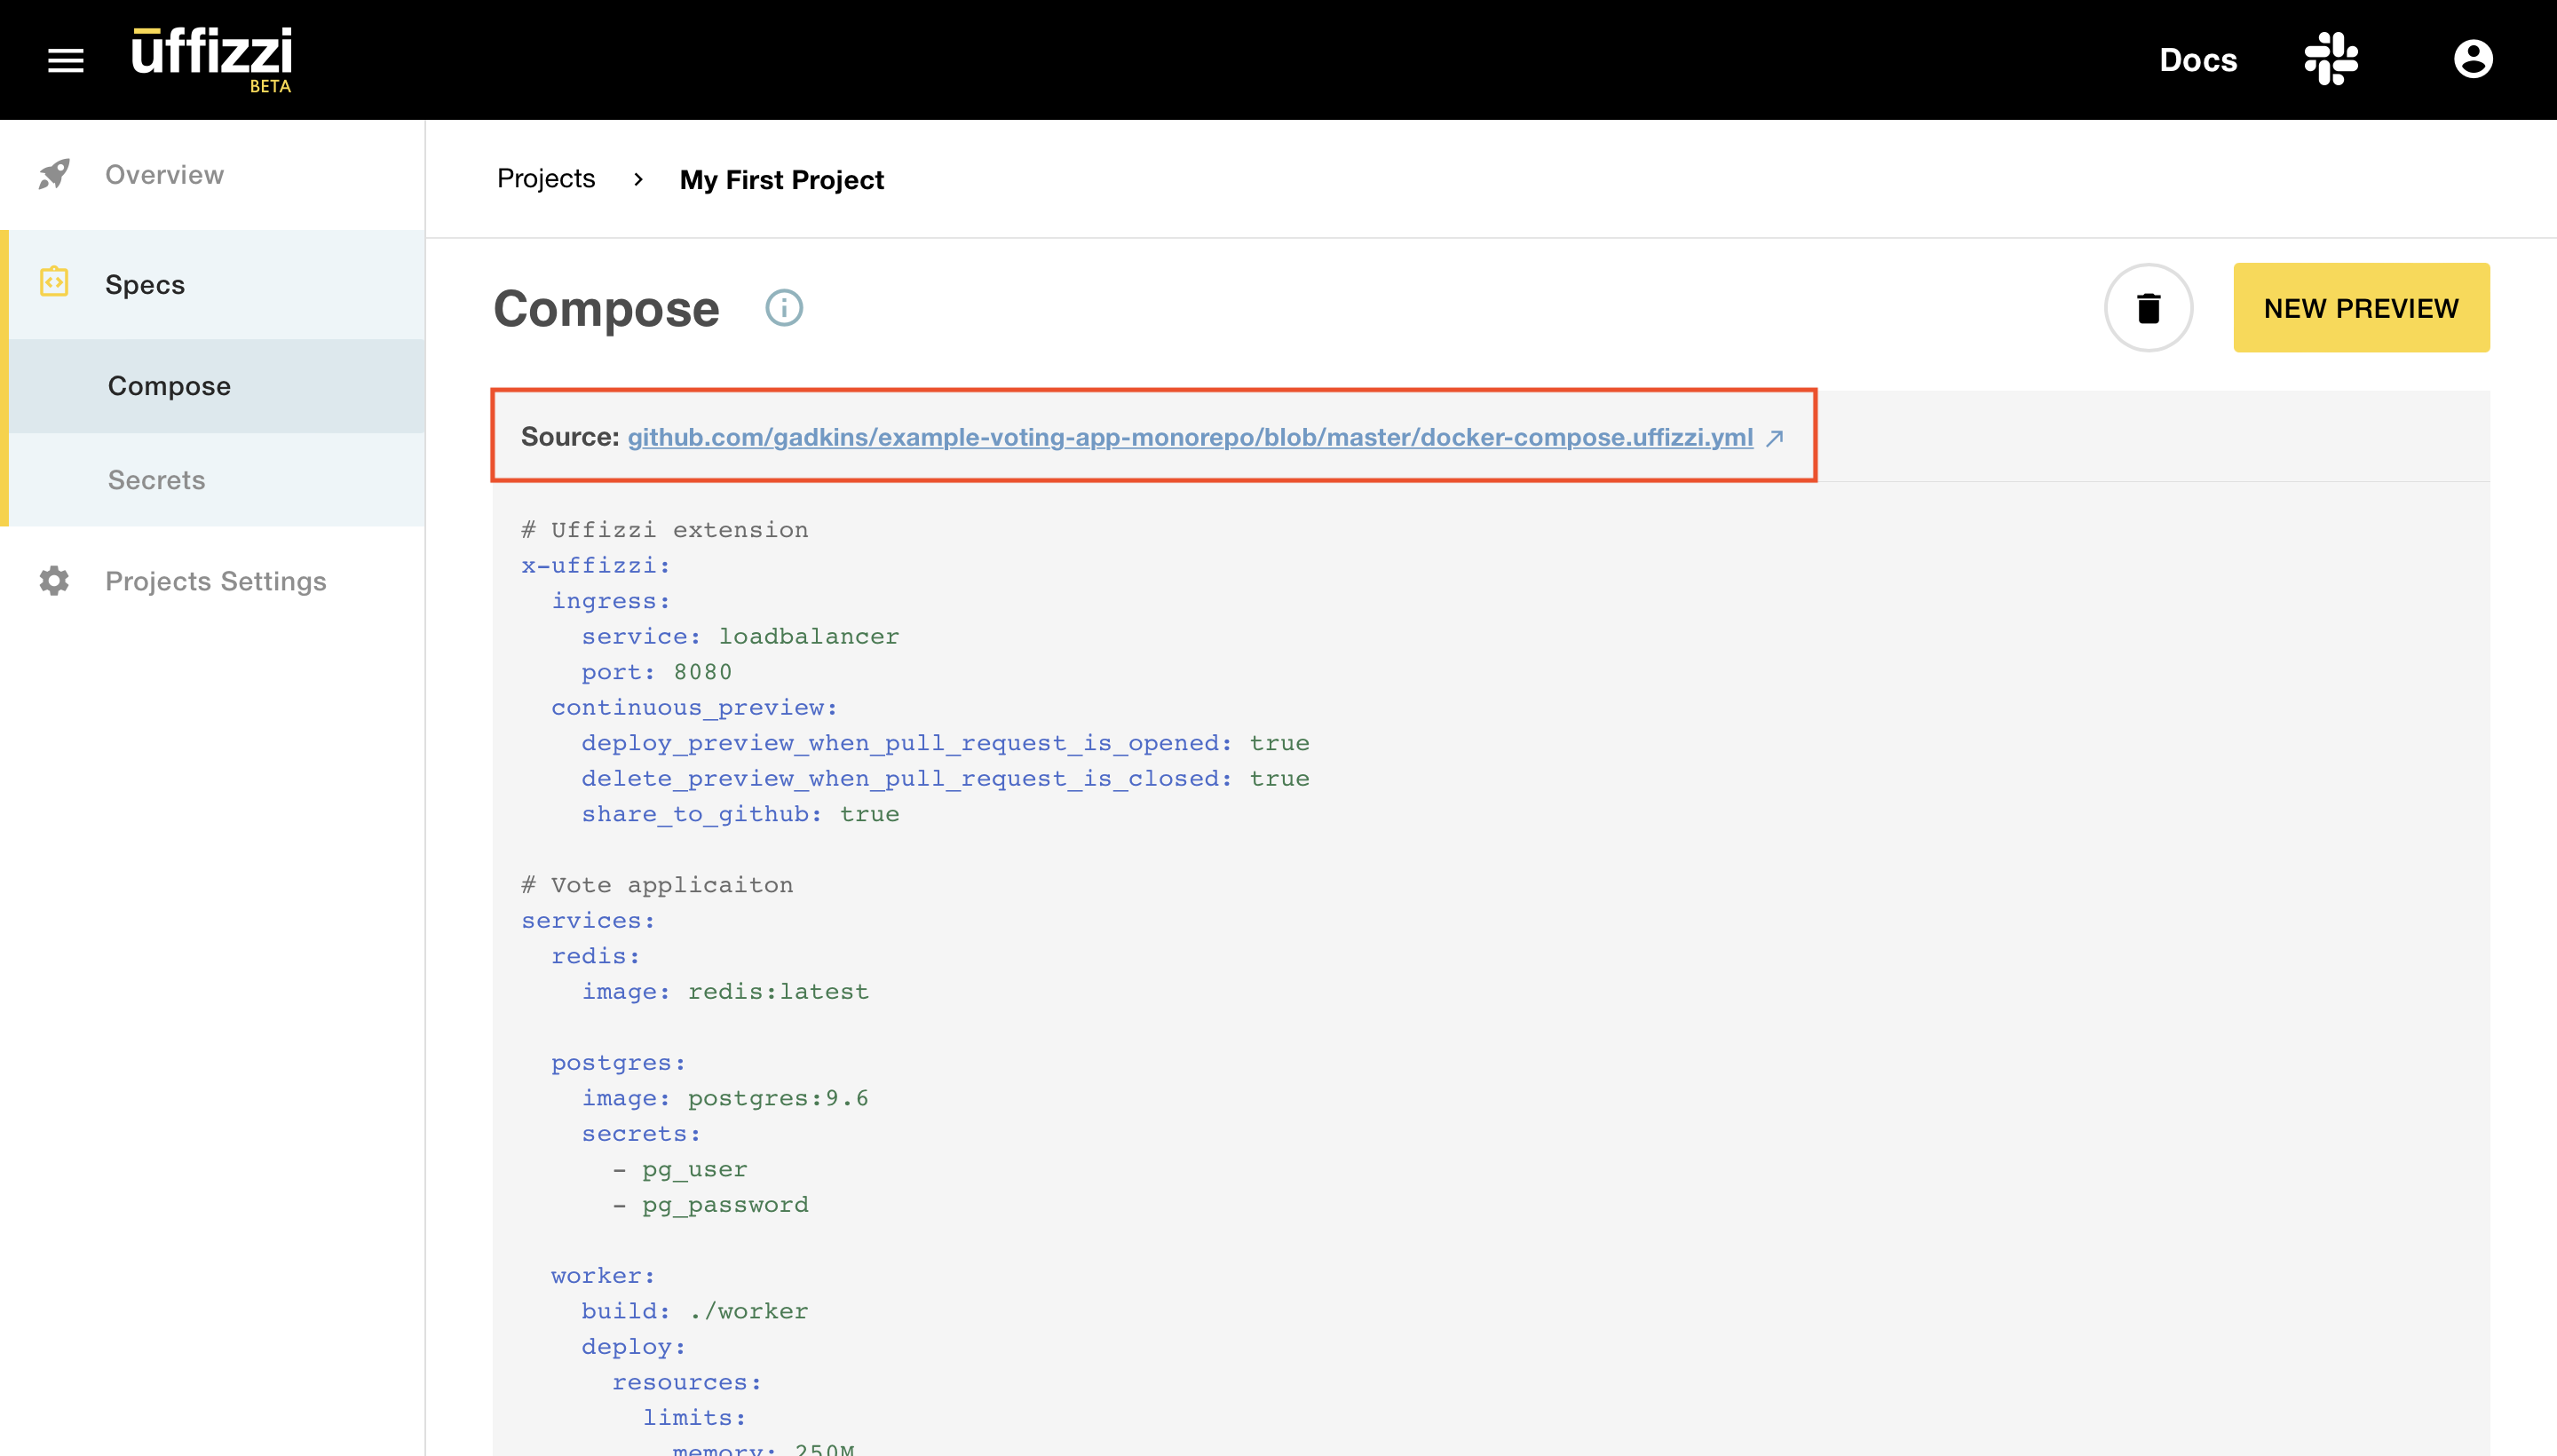
That's it! Uffizzi is now configured with your Docker Compose template. To test your setup, you can manually deploy your primary branch to an on-demand test environment using the NEW PREVIEW button in the Uffizzi Dashboard, or try opening a pull request on GitHub to deploy a feature branch.